Meteor.js in Action: Create an App, Test with Laika

Meteor is a next generation framework used for rapidly developing web apps, which seamlessly combines popular packages like MongoDB, Node.js, and jQuery, to name a few.
Check out the excellent Meteor documentation for more information. Grab the code from the repo here.
Please note: Before you can follow this tutorial, please install Node and npm.
With that, let’s start building …
This tutorial uses Meteor version
0.7.0.1- which, as of writing, is the latest version
Contents
- Setup a Project
- Create a Basic App
- Restructure
- Testing Framework
- Users can submit answers
- Users can see all submitted answers
- Users can up or down vote answers
- Users can login via Twitter
- Users can only answer or vote if they are logged in
- Remove insecure packages
- Deployment
- What’s next?
- Conclusion
Setup a Project
1. Install Meteor and the Meteor Package Manager, Meteorite:
$ curl https://install.meteor.com/ | sh
$ meteor update
$ npm install -g meteorite
Alternatively, you can install meteor with npm,
npm install -g meteor), however the npm package is not uploaded or maintained by Meteor Development Group
2. Create a Meteor project:
$ meteor create mymeteor
Look! It tells you exactly what to do:
To run your new app:
   cd mymeteor
   meteor
Go ahead and run it:
$ cd mymeteor
$ meteor
[[[[[ ~/Desktop/mymeteor ]]]]]

=> Meteor server running on: http://localhost:3000/
We just initialized the Meteor server. Navigate to [http://localhost:3000/] (http://localhost:3000/), and you should see:
If port 3000 is unavailable, you can use –port as an option:
$ meteor --port 1337
Leave the app running. The browser will automatically update as you save changes to your code.
What’s going on here?
Look at your basic project structure:
.
├── mymeteor.css
├── mymeteor.html
└── mymeteor.js
Your JS file contains both client and server code:
  // client!
  if (Meteor.isClient) {
    Template.hello.greeting = function () {
      return "Welcome to mymeteor.";
    };

    Template.hello.events({
      'click input' : function () {
        // template data, if any, is available in 'this'
        if (typeof console !== 'undefined')
          console.log("You pressed the button");
      }
    });
  }

  // server!
  if (Meteor.isServer) {
    Meteor.startup(function () {
      // code to run on server at startup
    });
  }
The behavior of {{greeting}} in the HTML file is controlled by Template within the client-side code in the JS file, as well as the handling of events.
Create a Basic App
In this example, we’ll be creating an app, which displays a question with a list of answers. Users can -
- Submit answers
- See all submitted answers
- Up or down vote answers
- Login via Twitter
- Only answer or vote if they are logged in
- View question but not submitted answers without logging in
Before we start adding this functionality, let’s first restructure the project.
Restructure
1. Add Packages (err Smart Packages!)
$ mrt add accounts-ui
accounts-ui: Simple templates to add login widgets to an app
$ mrt add accounts-twitter
accounts-twitter: Login service for Twitter accounts
$ mrt add bootstrap-3
bootstrap-3: Provides bootstrap 3.
Watch your browser as you add these. You should see the styles update almost immediately.
You can read more about these packages here, here, here. It’s pretty awesome that you can add these web components in just a matter of minutes! Awesome for prototyping!
You can view the available packages from the terminal by running the command -
meteor list
2. Add client and server folders
Add two new folders - “client” and “server”. Essentially, if Meteor detects a client folder, all the JavaScript within the folder will be run on the client-side, while JavaScript code found within the server folder will run only on the server-side.
Within the client folder, create a file called “mainClient.js” and add the following code:
if (Meteor.isClient) {
  Template.hello.greeting = function () {
    return "Welcome to mymeteor.";
  };

  Template.hello.events({
    'click input' : function () {
      // template data, if any, is available in 'this'
      if (typeof console !== 'undefined')
        console.log("You pressed the button");
    }
  });
}
Then within the server folder, and a file called “mainServer.js” and add the following code:
if (Meteor.isServer) {
  Meteor.startup(function () {
    // code to run on server at startup
  });
}
Delete the “mymeteor.js” file. If you look at your browser, everything should look the same. Add one more folder called “tests”, which as you probably guessed will include our unit tests along with a file called “index.js”.
Your project structure should now look like this:
.
├── client
│   └── mainClient.js
├── mymeteor.css
├── mymeteor.html
├── server
│   └── mainServer.js
└── tests
    └── index.js
3. Update HTML
Update “mymeteor.html”:
<head>
<meta charset="utf-8">
<meta name="viewport" content="width=device-width, initial-scale=1.0">
<meta name="description" content="">
<meta name="author" content="">
<title>One Question. Several Answers.</title>
<link rel="stylesheet" type="text/css" href="http://netdna.bootstrapcdn.com/bootswatch/3.0.3/yeti/bootstrap.min.css">
</head>
<body>
<div class="container">
{{> hello}}
</div>
</body>
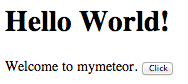
<template name="hello">
<h1>Hello World!</h1>
{{greeting}}
<input type="button" value="Click" />
</template>
Your app should now look like this:

Testing Framework
Since both client and server code are interconnected, we want to be able to write test cases that target both the client and server. Laika is by far the best framework for this.
For this reason, your tests will run bit slower.
Before installing Laika, make sure you have Node.js, PhantomJS, and MongoDB installed. Also, run mongod in a separate terminal window.
Install Laika:
$ sudo npm install -g laika
All of our tests will reside in the “index.js” file within the “tests” folder.
Now let’s start building.
Users can submit answers
1. Client JS
Answers = new Meteor.Collection("answers");

Template.addAnswer.events({
  'click input.add-answer' : function(e){
    e.preventDefault();
    var answerText = document.getElementById("answerText").value;
    Meteor.call("addAnswer",answerText,function(error , answerId){
      console.log('Added answer with ID: '+answerId);
    });
    document.getElementById("answerText").value = "";
  }
});
What’s going on?
First, we have a click event, which grabs the value from the input box. This value is then passed to the server side via the .call() - which is used to invoke a method. answerId is then the call back, which is then assigned to the console.log.
1. Server JS
Answers = new Meteor.Collection("answers");

Meteor.methods({
  addAnswer : function(answerText){
    console.log('Adding Answer ...');
    var answerId = Answers.insert({
      'answerText' : answerText,
      'submittedOn': new Date()
    });
    console.log(answerId)
    return answerId;
  }
});
What’s going on?
On the client side we passed the answerText - inputted value - to the server side. This answer is the added to the MongoDB collection, then we return the answerID, which is handled on the client side.
Notice how we established the Mongo collection on both the client and server.
3. HTML
<head>
  <meta charset="utf-8">
  <meta name="viewport" content="width=device-width, initial-scale=1.0">
  <meta name="description" content="">
  <meta name="author" content="">
  <title>One Question. Several Answers.</title>
  <link rel="stylesheet" type="text/css" href="http://netdna.bootstrapcdn.com/bootswatch/3.0.3/yeti/bootstrap.min.css">
</head>

<body>
  <div class="container">
    <h1>Add an answer. Or vote.</h1>
    <h3><em>Question</em>: Is the world getting warmer?</h3>
    <br>
    <div>
      <!-- if there is an answer, append it to the DOM -->
      {{> addAnswer}}
    </div>
  </div>
</body>

<template name="addAnswer">
  <textarea class="form-control" rows="3" name="answerText" id="answerText" placeholder="Add Your Answer .."></textarea>
  <br>
  <input type="button" class="btn-primary add-answer btn-md" value="Add Answer"/>
</template>
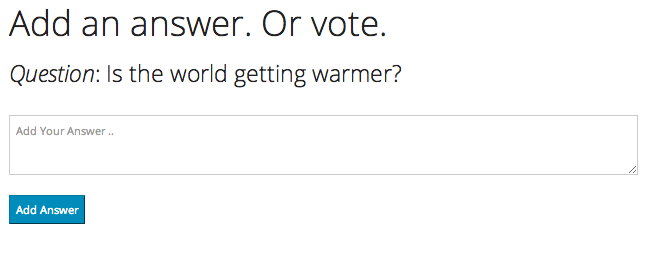
4. Manually Test
First, your browser view should now look like this:
Next, arrange your screen so that you can view both your terminal as well as your browser. Also, open up the JS debug console:
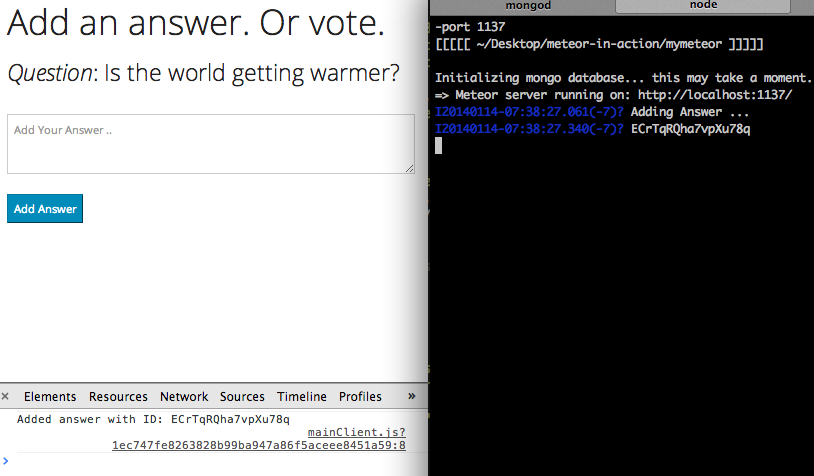
Then, just like in the screenshot above, add an answer. On the client side, you should see the MongoDB ID - i.e., Added answer with ID: ECrTqRQha7vpXu78q, which should match the ID on the server side:
I20140114-07:38:27.061(-7)? Adding Answer ...
I20140114-07:38:27.340(-7)? ECrTqRQha7vpXu78q
Want to see something cool? Of course you do.
Open up your browser’s console. Let’s add an answer:
> Answers.insert({answerText: 'Client Side Console Test!'});
"3D9nQYn87gXQX66ha"
You should see the answer appear on the page instantly!!
5. Automated Test
Now, add a Laika test by adding the following code to “index.js”:
'use strict'

var assert = require('assert');

suite('submitAnswers', function() {

  // ensure that -
  // (1) the "Answers" collection exists
  // (2) we can connect to the collection
  // (3) the collection is empty
  test('server initialization', function(done, server) {
    server.eval(function() {
      var collection = Answers.find().fetch();
      emit('collection', collection);
    }).once('collection', function(collection) {
      assert.equal(collection.length, 0);
      done();
    });
  });

  // ensure that -
  // (1) we can add data to the collection
  // (2) after data is added, we can retrieve it
  test('server insert : OK', function(done, server, client) {
    server.eval(function() {
      Answers.insert({answerText: "whee!"  });
      var collection = Answers.find().fetch();
      emit('collection', collection);
    }).once('collection', function(collection) {
      assert.equal(collection.length, 1);
      done();
    });

    client.once('collection', function(collection) {
      assert.equal(Answers.find().fetch().length, 1);
      done();
    });
  });

});
What’s going on here?
Basically, we are just testing that the Answers collection exists and is accessible. See the inline comments for more info.
You may have noticed that Laika runs a bit slow. Well, that’s normal - because Laika creates a new, isolated app and database for each test, and each test is also isolated for the other, so you don’t have to worry about dumping the database after each test.
Run the test
If all goes well, you should see this:
$ laika

  injecting laika...
  loading phantomjs...
  loading initial app pool...


  submitAnswers
    ✓ server initialization (1517ms)
    ✓ server insert : OK


  2 passing (2s)

  cleaning up injected code
Congrats! You just wrote your first test!
If you have not initialized a Git repo yet, go ahead and do this now. Then commit the code.
Users can see all submitted answers
1. Client JS
Add the following template to pull out the data from the collection and sort in descending order.
return Answers.find({},{sort:{'submittedOn':-1}});
2. HTML
Add the templates to the HTML file:
<head>
  <meta charset="utf-8">
  <meta name="viewport" content="width=device-width, initial-scale=1.0">
  <meta name="description" content="">
  <meta name="author" content="">
  <title>One Question. Several Answers.</title>
  <link rel="stylesheet" type="text/css" href="http://netdna.bootstrapcdn.com/bootswatch/3.0.3/yeti/bootstrap.min.css">
</head>

<body>
  <div class="container">
    <h1>Add an answer. Or vote.</h1>
    <h3><em>Question</em>: Is the world getting warmer?</h3>
    <br>
    <div>
      <!-- if there is an answer, append it to the DOM -->
      {{> addAnswer}}
      {{> answers}}
    </div>
  </div>
</body>

<template name="addAnswer">
  <textarea class="form-control" rows="3" name="answerText" id="answerText" placeholder="Add Your Answer .."></textarea>
  <br>
  <input type="button" class="btn-primary add-answer btn-md" value="Add Answer"/>
</template>

<template name="answers">
  <br>
  <br>
  <h2>All Questions</h2>
  {{#each items}}
    {{> answer}}
  {{/each}}
</template>

<template name="answer">
  <div>
    <p class="lead">
      {{answerText}}
      <br>
    </p>
  </div>
</template>
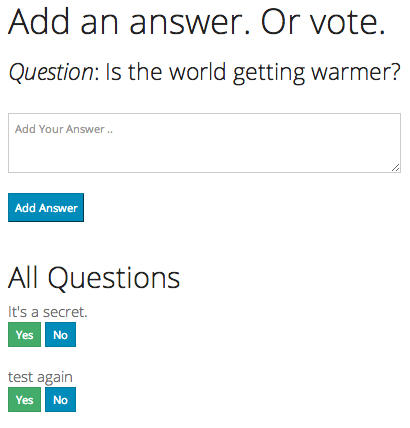
3. Manually Test
You should see all of the submitted answers:
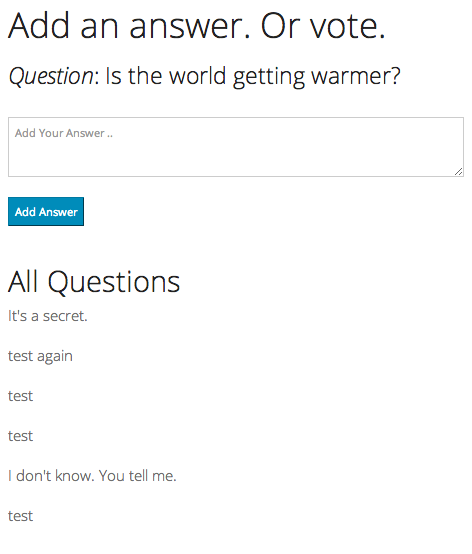
Go ahead and add new answers. They should immediately appear.
As far as automated testing goes, we are already testing this with this code:
client.once('collection', function(collection) {
  assert.equal(Answers.find().fetch().length, 1);
  done();
Commit your code.
Users can up or down vote answers
Let’s add some voting capabilities. Think about what we need to add for this.
- Update collection to store votes
- Update HTML to add vote buttons
- Event handler for when the user clicks a button so that the collection is updated
1. Server JS
Add the following code:
incrementYesVotes : function(answerID){
  console.log(answerID);
  Answers.update(answerID,{$inc : {'yes':1}});
},
incrementNoVotes : function(answerID){
  console.log(answerID);
  Answers.update(answerID,{$inc : {'no':1}});
}
This utilizes Meteor’s collection update to increment the counter.
2. Client JS
Add the event handler:
Template.answer.events({
  'click': function () {
    Session.set("selected_answer", this._id);
  },
  'click a.yes' : function(e) {
    e.preventDefault();
    var answerId = Session.get('selected_answer');
    console.log('updating yes count for answerId '+answerId);
    Meteor.call("incrementYesVotes",answerId);
  },
  'click a.no': function(e) {
    e.preventDefault();
    var answerId = Session.get('selected_answer');
    console.log('updating no count for answerId '+answerId);
    Meteor.call("incrementNoVotes",answerId);
  }
});
3. HTML
Update the answer template:
<template name="answer">
  <div>
    <p class="lead">
      {{answerText}}
      <br>
      <a class="btn btn-xs btn-success yes" href="#"><i class="icon-thumbs-up"></i> Yes {{yes}}</a>
      <a class="btn btn-xs btn-primary no" href="#"><i class="icon-thumbs-down"></i> No {{no}}</a>
    </p>
  </div>
</template>
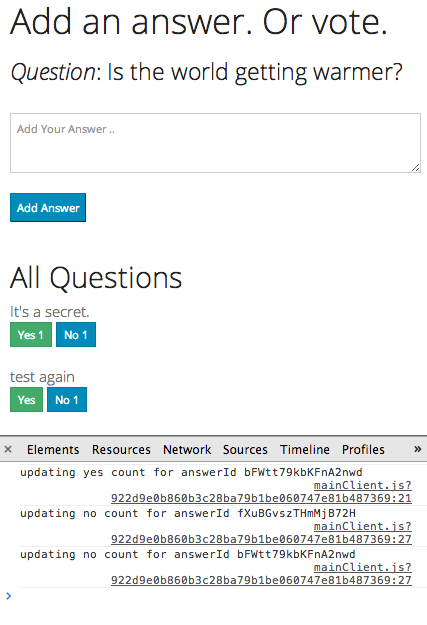
3. Manually Test
You should see Yes and No buttons below the answers:
Test it out:
4. Automated Test
Add the following code to “index.js”:
suite('addVotes', function() {

  // ensure that -
  // (1) we can add data to the collection
  // (2) after data is added, we can retrieve it
  test('server insert votes : OK', function(done, server, client) {
    server.eval(function() {
      Answers.insert({answerText: "wheeeeeeeeeee!"});
      Answers.update({answerText: "wheeeeeeeeeee!"},{$inc : {'yes':1}});
      var voteCollection = Answers.find().fetch();
      emit('collection', voteCollection);
    }).once('collection', function(voteCollection) {
      // console.log(collection[0].yes)
      assert.equal(voteCollection[0].yes, 1);
      done();
    });
  });

});
What’s going on here?
Similar to the last test, we are just testing that the collection exists and that it returns certain data. This time, though, we are not just testing that the collection exists, but that the yes key contains a value of 1.
Run the test
$ laika

  injecting laika...
  loading phantomjs...
  loading initial app pool...


  submitAnswers
    ✓ server initialization (1882ms)
    ✓ server insert : OK (2957ms)

  addVotes
    ✓ server insert votes : OK (3105ms)


  3 passing (8s)

  cleaning up injected code
Commit your code!
Users can login via Twitter
Remember when we added these two packages-
accounts-uiaccounts-twitter
-well, let’s go ahead and use them.
1. Update HTML
<body>
  <div class="container">
    <h1>Add an answer. Or vote.</h1>
    <div>
      {{loginButtons}}
    </div>
    <br>
    <h3><em>Question</em>: Is the world getting warmer?</h3>
    <br>
    <div>
      <!-- if there is an answer, append it to the DOM -->
      {{> addAnswer}}
      {{> answers}}
    </div>
  </div>
</body>
Check your browser. You should see the “Configure Twitter Login” button. Go ahead and click it:
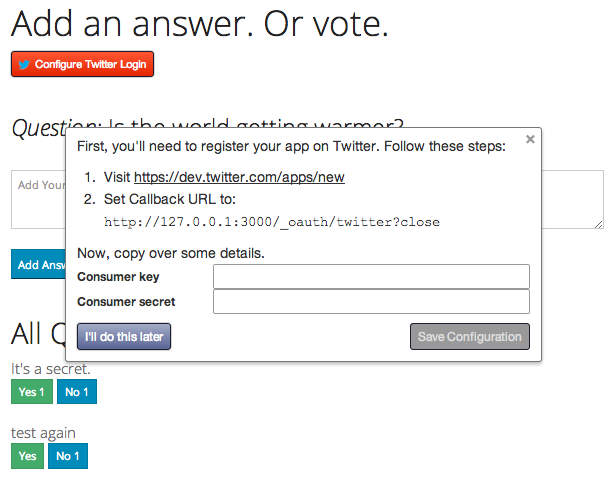
Wow. This tells you exactly how to setup your app on Twitter for logging via Oauth. Follow the instructions to create the app, then copy and paste the consumer key and consumer secret into the window on the Meteor app.
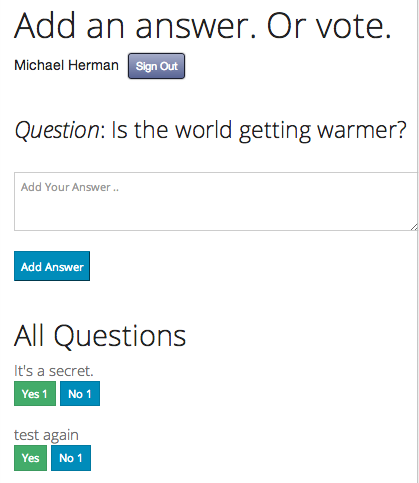
Next, test logging in. If all went well you should see:
If you need to add a different Twitter app to authenticate with you must drop the
meteor_accounts_loginServiceConfigurationcollection from MongoDB -db.meteor_accounts_loginServiceConfiguration.drop()
4. Automated Test
Since the Twitter login is part of a pre-written package, we do not need to do any unit tests. In general, unit tests should be reserved to code that you have written. Other people’s code should be tested within the scope of a functional test, which I cannot figure out how to do with Laika. You could use Selenium or PhantomJS here, but I think just the manual testing is fine for now. The Meteor team really needs to develop an internal testing solution.
Commit your code. Take a breath. Move on.
Users can only answer or vote if they are logged in
Finally, let’s add some restrictions so that a user must be logged in before adding answers or voting.
1. Client JS
Template.answer.events({
  'click': function () {
    Session.set("selected_answer", this._id);
  },
  'click a.yes' : function(e) {
    e.preventDefault();
    if(Meteor.userId()){
      var answerId = Session.get('selected_answer');
      console.log('updating yes count for answerId '+answerId);
      Meteor.call("incrementYesVotes",answerId);
    }
  },
  'click a.no': function(e) {
    e.preventDefault();
    if(Meteor.userId()){
      var answerId = Session.get('selected_answer');
      console.log('updating no count for answerId '+answerId);
      Meteor.call("incrementNoVotes",answerId);
    }
  }
});
2. Server JS
var answerId = Answers.insert({
  'answerText' : answerText,
  'submittedOn': new Date(),
  'submittedBy' : Meteor.userId()
});
3. HTML
<head>
<meta charset="utf-8">
<meta name="viewport" content="width=device-width, initial-scale=1.0">
<meta name="description" content="">
<meta name="author" content="">
<title>One Question. Several Answers.</title>
<link rel="stylesheet" type="text/css" href="http://netdna.bootstrapcdn.com/bootswatch/3.0.3/yeti/bootstrap.min.css">
</head>
<body>
<div class="container">
<h1>Add an answer. Or vote.</h1>
{{#if currentUser}}
{{loginButtons}}
{{/if}}
<br>
<h3><em>Question</em>: Is the world getting warmer?</h3>
<br>
<div>
{{#if currentUser}}
{{> addAnswer}}
{{> answers}}
{{/if}}
{{#unless currentUser}}
{{> login}}
{{loginButtons}}
{{/unless}}
</div>
</div>
</body>
<template name="addAnswer">
<textarea class="form-control" rows="3" name="answerText" id="answerText" placeholder="Add Your Answer .."></textarea>
<br>
<input type="button" class="btn-primary add-answer btn-md" value="Add Answer"/>
</template>
<template name="answers">
<br>
<br>
<h2>All Questions</h2>
{{#each items}}
{{> answer}}
{{/each}}
</template>
<template name="answer">
<div>
<p class="lead">
{{answerText}}
<br>
<a class="btn btn-xs btn-success yes {{#unless currentUser}}disabled{{/unless}}" href="#"><i class="icon-thumbs-up"></i> Yes {{yes}}</a>
<a class="btn btn-xs btn-primary no {{#unless currentUser}}disabled{{/unless}}" href="#"><i class="icon-thumbs-down"></i> No {{no}}</a>
</p>
</div>
</template>
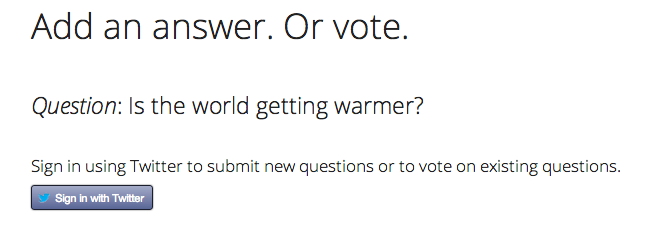
<template name="login">
<h4>Sign in using Twitter to submit new questions or to vote on existing questions.</h4>
</template>
What’s going on here?
if(Meteor.userId()){}prevents a user from voting if they are not logged in, but only on the JS side. In other words, the user can still click the button; it’s just nothing will happen if they do.'submittedBy' : Meteor.userId()adds the logged in user to the collection{{#unless currentUser}}disabled{{/unless}}disables the yes or no button. Now the it can’t even be clicked unless the user is logged in.{{#if currentUser}} ... {{/if}}and{{#unless currentUser}} ... {{/unless}}are used to display certain templates if the user is logged in or not.
4. Manual Test
Open your browser. If you’re logged in, go ahead and log out. You should see this:
Now, before logging in to test. Let’s dump the answers collection so that each record in the collection has a user associated with it. To do this, make sure your meteor app is running, then open a new terminal window and navigate to your app’s project root.
Follow these commands to dump the collection:
$ meteor mongo
MongoDB shell version: 2.4.8
connecting to: 127.0.0.1:3002/meteor
meteor:PRIMARY> show dbs;
local 0.0625GB
meteor  0.0625GB
meteor:PRIMARY> use meteor;
switched to db meteor
meteor:PRIMARY> show collections;
answers
meteor_accounts_loginServiceConfiguration
questions
system.indexes
users
meteor:PRIMARY> db.answers.drop()
true
Back on your browser, go ahead and log back in. Add an answer.
Finally, jump back to the mongo shell:
meteor:PRIMARY> show collections;
answers
meteor_accounts_loginServiceConfiguration
questions
system.indexes
users
meteor:PRIMARY> db.answers.find()
{ "_id" : "cbWebazW8eehJkaXL", "answerText" : "This is my first test while logged in.", "no" : 2, "submittedBy" : "Ex2bHmCgkygNbByEc", "submittedOn" : ISODate("2014-01-14T20:07:53.080Z"), "yes" : 2 }
Success! There is a key/value pair for the user - "submittedBy" : "Ex2bHmCgkygNbByEc".
Remove insecure packages
All Meteor applications have a package called Insecure pre-installed. This handy little package gives the client the ability to interact with the database, as you saw before. While this may be handy for prototyping you always want to remove it for production applications.
To remove, just run:
$ meteor remove insecure
1. Manually Test
Manually test this on your end. With the Meteor server running and your browser open, try to insert an answer in the console. Make sure that the user is logged in.
> Answers.insert({answerText: 'Client Console Test!'})
"oeYhZMmXyBjivJ5uM"
insert failed: Access denied
You should the see above insertion error. Also, you know that it’s not working if the answer did not get immediately added to the page.
Finally, you can look in Mongo, just to be sure. Open a new window in your terminal, navigate to your “mymeteor” directory, then type the following commands:
$ meteor mongo
MongoDB shell version: 2.4.8
connecting to: 127.0.0.1:3002/meteor
meteor:PRIMARY> show dbs;
local 0.0625GB
meteor  0.0625GB
meteor:PRIMARY> use meteor;
switched to db meteor
meteor:PRIMARY> show collections;
answers
meteor_accounts_loginServiceConfiguration
questions
system.indexes
users
Now search the collection:
meteor:PRIMARY> db.answers.find({answerText: 'Client Console Test!'})
meteor:PRIMARY>
This shouldn’t find anything.
Deployment
Although there are a number of deployment options, pushing your new app to the Meteor test servers is by far the easiest. Simply run the command: meteor deploy <YOUR-APP-NAME-HERE>.
So -
meteor deploy answers
Check it out at http://answers.meteor.com/.
The Meteor servers are for testing only; they are not meant for apps in production.
Don’t forget to commit!
What’s next?
- Deploy to Heroku
- Setup Selenium Tests
- Add additional functionality
Conclusion
That’s it. Give me some feedback. In the coming weeks, I’ll be deploying an app into production. Stay tuned.
Grab the code from the repo here