Mad Libs with jQuery: A gentle introduction to Javascript and jQuery
Did you ever play Mad Libs as a kid? If not, the rules are simple: You fill out a random list of words based on a part of speech - e.g, nouns, verbs, adjectives, and adverbs - without knowing the underlying context. These words are then inserted into a story. When read, the results are generally humorous, causing much laughter.
- Try it here - http://backwardsteps.com/madlibs/.
- Grab the repo here - http://github.com/mjhea0/jquery-madlibs
Let’s have some fun.
Contents
- Step 1: Create a Project Boilerplate
- Step 2: Add a Form
- Step 3: Handle the Event
- Step 4: Append the text to the DOM
- Step 5: Update the Form and Add the Story
- Step 6: Update the jQuery
- Step 7: Handle Another Event
- All done?
- Challenges
- Too hard? Start with the basics.
Step 1: Create a Project Boilerplate
Start by creating the following files and directories, to define a basic project structure:
What program are you using to make these files in? I will be using Sublime Text for this tutorial, which is an advanced text editor for Windows, Mac, and Linux. If you are looking for something simpler, check out gedit - which is also cross-platform. Both of these editors have syntax highlighting. Put simply, syntax highlighting helps distinguish between different parts of a languages syntax (rules), by highlighting common parts the same color. This makes code easier to read and debug.
├── css
│   └── main.css
├── index.html
└── js
    └── main.js
index.html
<!DOCTYPE html>
<html>
  <head>
    <link href="http://netdna.bootstrapcdn.com/bootswatch/3.0.3/united/bootstrap.min.css" rel="stylesheet" type="text/css" media="all">
    <link href="css/main.css" rel="stylesheet" type="text/css" media="all">
    <title>My AWESOME Boilerplate</title>
  </head>
  <body>
    <div class="container">
      <h1>Hello, World!</h1>
    </div>
    <script src="http://code.jquery.com/jquery-1.10.2.min.js"></script>
    <script src="http://netdna.bootstrapcdn.com/bootstrap/3.0.3/js/bootstrap.min.js"></script>
    <script src="js/main.js"></script>
  </body>
</html>
main.css
/* main.css */
main.js
$(function() {
  console.log("whee!")
});
What’s going on?
This is a good base for us to start with.
Open the “index.html” file in your web browser. You should see “Hello, World”.
Go back and look at “index.html” in your text editor. You’re looking at HTML. Put simply, HTML is the language used for creating websites, displayable in a web browser. Now open the “main.css” file. While HTML provides the structure, CSS makes webpages look pretty. Together, they are the fundamental building blocks for web pages.
So, while we’re on the topic of HTML, there are a number of different parts and rules. If I attempted to explain them all, this tutorial would last for days. Fortunately, for this tutorial, you really only need to understand tags, elements, and selectors.
<div class="container">
  <h1>Hello, World!</h1>
</div>
- Tags form the structure of your page. There usually is an opening tag and then a closing tag, like -
<div></div>. - Elements represent the tags as well as whatever falls within the tags, like -
<h1>Hello, World!</h1> - Selectors are used to select the tag for some purpose. You could use them for defining styles via CSS or as JavaScript or jQuery hooks - that is, for referencing certain JavaScript code back to the HTML. Put another way, with regard to Javascript, selectors are used to access either tags or elements.
Did you notice that one of my CSS files and two of my scripts are imported from an external URL? These come from a Content Delivery Network (CDN). There are benefits for doing this. See if you can figure them out. Use Google.
In the JS file there is a console.log. This is a debugging tool that allows you to post a message to the browser’s JavaScript console - e.g. Firebug (Firefox) or Developer Tools (Chrome / Safari). If you’ve never used this before, Google “accessing the js console in Chrome” to learn how to pull up the JavaScript console.
What about Internet Explorer? Can I use the debugger in that? Honestly, I do not know. But the majority of web developers do not use Internet Explorer, because it is simply not developer friendly - it does not have the developer tools that Chrome or Firefox has.
Open your console. You should see the text “whee!”.
Oh - and JavaScript is used in conjunction with HTML and CSS to make webpages interactive.
Step 2: Add a Form
For Mad Libs we need to display a form for the user to enter words. Let’s start with a simplified version.
index.html
Add the following code to your “index.html” file right after <h1>Hello, World!</h1>:
<!-- start form -->
<form id="my-form" role="form">
  <input id="my-input" class="form-control" type="text" placeholder="Enter something ..">
  <br>
  <button type="submit" class="btn btn-primary btn-md">My BIG Button</button>
</form>
<!-- end form -->
Updated file:
<!DOCTYPE html>
<html>
  <head>
    <link href="http://netdna.bootstrapcdn.com/bootswatch/3.0.3/united/bootstrap.min.css" rel="stylesheet" type="text/css" media="all">
    <link href="css/main.css" rel="stylesheet" type="text/css" media="all">
    <title>My AWESOME Boilerplate</title>
  </head>
  <body>
    <div class="container">
      <h1>Hello, World!</h1>
      <!-- start form -->
      <form id="my-form" role="form">
        <input id="my-input" class="form-control" type="text" placeholder="Enter something ..">
        <br>
      </form>
      <button type="submit" class="btn btn-primary btn-md">My BIG Button</button>
      <!-- end form -->
    </div>
    <script src="http://code.jquery.com/jquery-1.10.2.min.js"></script>
    <script src="http://netdna.bootstrapcdn.com/bootstrap/3.0.3/js/bootstrap.min.js"></script>
    <script src="js/main.js"></script>
  </body>
</html>
What’s going on?
So, here we just added an input and a submit button. Notice all of the new ids and classes. Many of these are associated with Bootstrap to provide some basic styles.
Let’s add some custom styles within our local CSS file, “main.css”:
main.css
/* main.css */

.container {
  padding-top: 50px;
  max-width: 300px;
}
What’s going on?
This added the padding to the top of the page and also set a maximum width to the .container class.
Find that class in the HTML file. Try tweaking the pixel values to alter the look of the page.
Test out the page in you browser. Insert a word into the input box and click the button. Nothing happens. We need to somehow grab that inputted word and do something with it.
Step 3: Handle the Event
The process of grabbing the inputted word from the form when a user clicks the button is commonly referred to as an event handler. In this case, the event is the actual button click. We will use jQuery to “handle” that event.
Please note that jQuery is JavaScript. Well, it’s actually a set of libraries developed in JavaScript. But it is possible to perform all the same functionality jQuery provides in vanilla Javascript; it just takes a lot more code.
These libraries simplify many of the features in JavaScript such as HTML document (DOM) traversing, event handling, and AJAX using fewer lines of code. Again, utilize Google to find a good tutorial on JavaScript, jQuery, and their differences.
main.js
Update “main.js”
$(function() {

  console.log("whee!")

  // event handler
  $("#btn-click").click(function(e) {
    var input = $("input").val()
    console.log(input)
  });

});
Add an id (id="btn-click") to “index.html” within the <button> tags:
Before:
<button type="submit" class="btn btn-primary btn-md">My BIG Button</button>
After:
<button type="submit" id="btn-click" class="btn btn-primary btn-md">My BIG Button</button>
What’s going on?
$("#btn-click").click(function(e) {is the event. This initiates the process, running the code in the remainder of the function. In other words, the remaining JavaScript/jQuery will not run until there is a button click.var input = $("input").val()sets a variable called “input”, while.val()fetches the value from the form input.id="btn-click"is used to tie the HTML to the JavaScript. This id is reference in the initial event within the JavaScript file -"#btn-click".console.log(input)displays the word to the end user via the JavaScript console.
The
$()in$("#btn-click").click()is a jQuery constructor. Basically, it’s used to tell the browser that the code within the parenthesis is jQuery.
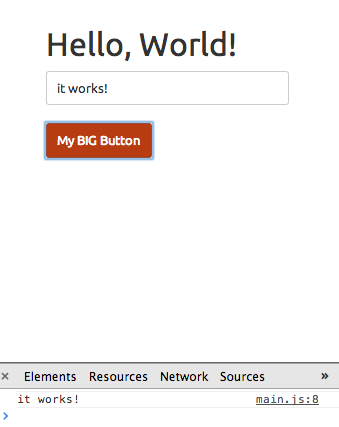
Open “index.html” in your browser. Make sure you have your JavaScript console open. Enter a word in the input box and click the button. This should display the word in the console:
Step 4: Append the text to the DOM
Next, instead of using a console.log to display the inputted word to the user, let’s add it to the Document Object Model (DOM)? Wait. What’s the DOM? Quit simply, the DOM is a structural representation of the HTML document. Using JavaScript, you can add, remove, or modify the contents of the DOM, which changes how the page looks to the end user.
In this case, we want to add the text to the DOM.
main.js
Open up your JavaScript file and add this line of code:
$(".results").empty().append(input);
Updated file:
$(function() {

  console.log("whee!")

  // ---- event handler ---- //
  $("#btn-click").click(function(e) {
    // grab the value from the input box after the button click
    var input = $("input").val()
    // display value within the browser's JS console
    console.log(input)
    // add the value to the DOM
    $(".results").append(input);
  });

});
index.html
Add the following lines just below the form:
<br>
<br>
<!-- inputted text after button click -->
<p class="results"></p>
What’s going on?
$(".results").append(input); adds the value of the input variable to the DOM between the <p> tags that have the class name “results” - which is exactly what we added to “index.html”: <p class="results"></p>.
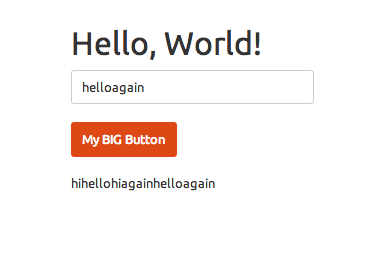
Test this out in your browser. You should see this:
main.js
Before moving on, we need to make one last update to “main.js”. Did you notice how each of the words were placed in the DOM next to one another. That looks a bit sloppy. We could add a list to organize it. But let’s just display only the last submitted word.
Before:
$(".results").append(input);
After:
$(".results").empty().append(input);
I’m sure you can guess what this method does. If not, test it out. Test it out, regardless. :)
That’s it for the basics. Next, let’s move on to adding the Mad Libs functionality.
Step 5: Update the Form and Add the Story
First, expand the form:
index.html
<!-- start form -->
<div id="questions">
  <h1>Please fill out the following!</h1>
  <hr>
  <form role="form">
    <div class="form-group">
      <label for="person">Boy's Name</label>
      <input id="person" class="form-control person" type="text" placeholder="Enter a boy's name ..">
    </div>
    <div class="form-group">
      <label for="adjective">Adjective</label>
      <input id="adjective" class="form-control adjective" type="text" placeholder="Enter an adjective ..">
    </div>
    <div class="form-group">
      <label for="noun">Plural noun</label>
      <input id="noun" class="form-control noun" type="text" placeholder="Enter a plural noun ..">
    </div>
    <div class="form-group">
      <label for="insect">An insect, plural</label>
      <input id="insect" class="form-control insect" type="text" placeholder="Enter an insect, plural ..">
    </div>
    <div class="form-group">
      <label for="noun2">Plural noun</label>
      <input id="noun2" class="form-control plural-noun" type="text" placeholder="Enter a plural noun ..">
    </div>
    <div class="form-group">
      <label for="verb">A verb ending in "s"</label>
      <input id="verb" class="form-control verb" type="text" placeholder="Enter a verb ending in "s" ..">
    </div>
    <div>
    </div>
  </form>
  <button id="btn-click" type="submit" class="btn btn-primary btn-lg">Generate!</button>
  <hr>
</div>
<!-- end form -->
What’s going on?
Here we added a new form with both labels and inputs. I also updated the page title, <title>Morning Mad Libs</title>, and removed <h1>Hello, World!</h1>.
Go ahead and update the max-width of the container in the CSS file to 500px: max-width: 500px;.
Check out the file in the browser:

index.html
Next, remove this code-
<br>
<br>
<!-- inputted text after button click -->
<p class="results"></p>
-and in it’s place add the story:
<!-- start story -->
<div id="story">
  <h1>Mad with the Libs</h1>
  <hr>
  <h3>I'm in love with <span class="person"></span>. He's so <span class="adjective"></span>! He has big flat <span class="noun"></span>, and when our <span class="insect"></span> meet, I get <span class="noun2"></span> in my stomach. I've fallen for him like a ton of <span class="verb"></span>, and he shuffles for me, too. But I think he's got another girlfriend. What should I do?</h3>
</div>
<!-- end story -->
Updated file:
<!DOCTYPE html>
<html>
  <head>
    <!-- stylesheets -->
    <link href="http://netdna.bootstrapcdn.com/bootswatch/3.0.3/united/bootstrap.min.css" rel="stylesheet" type="text/css" media="all">
    <link href="css/main.css" rel="stylesheet" type="text/css" media="all">
    <title>Morning Mad Libs</title>
  </head>
  <body>
    <div class="container">

      <!-- start form -->
      <div id="questions">
        <h1>Please fill out the following!</h1>
        <hr>
        <form role="form">
          <div class="form-group">
            <label for="person">Boy's Name</label>
            <input for="person" class="form-control person" type="text" placeholder="Enter a boy's name ..">
          </div>
          <div class="form-group">
            <label for="adjective">Adjective</label>
            <input for="adjective" class="form-control adjective" type="text" placeholder="Enter an adjective ..">
          </div>
          <div class="form-group">
            <label for="noun">Plural noun</label>
            <input id="noun" class="form-control noun" type="text" placeholder="Enter a plural noun ..">
          </div>
          <div class="form-group">
            <label for="insect">An insect, plural</label>
            <input id="insect" class="form-control insect" type="text" placeholder="Enter an insect, plural ..">
          </div>
          <div class="form-group">
            <label for="noun2">Plural noun</label>
            <input id="noun2" class="form-control plural-noun" type="text" placeholder="Enter a plural noun ..">
          </div>
          <div class="form-group">
            <label for="verb">A verb ending in "s"</label>
            <input id="verb" class="form-control verb" type="text" placeholder="Enter a verb ending in "s" ..">
          </div>
          <div>
          </div>
        </form>
        <button id="btn-click" type="submit" class="btn btn-primary btn-lg">Generate!</button>
        <hr>
      </div>
      <!-- end form -->

      <!-- start story -->
      <div id="story">
        <h1>Mad with the Libs</h1>
        <hr>
        <h3>I'm in love with <span class="person"></span>. He's so <span class="adjective"></span>! He has big flat <span class="noun"></span>, and when our <span class="insect"></span> meet, I get <span class="noun2"></span> in my stomach. I've fallen for him like a ton of <span class="verb"></span>, and he shuffles for me, too. But I think he's got another girlfriend. What should I do?</h3>
      </div>
      <!-- end story -->

    </div>
    <!-- scripts -->
    <script src="http://code.jquery.com/jquery-1.10.2.min.js"></script>
    <script src="http://netdna.bootstrapcdn.com/bootstrap/3.0.3/js/bootstrap.min.js"></script>
    <script src="js/main.js"></script>
  </body>
</html>
What’s going on?
Notice the <span> tags. The actual words will be inserted between them once the user clicks the button. Notice how the classes for each span matches the input id in the form. This is not required, but it just makes the naming consistent.
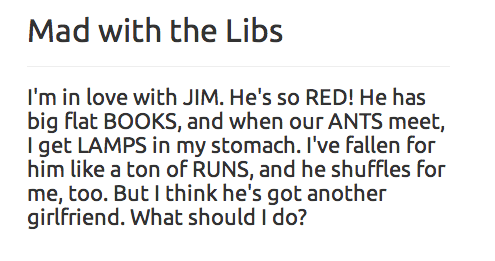
Check it out in your browser.
Step 6: Update the jQuery
Now we need to expand our JavaScript file so that upon the event (button click), we grab all the values, then insert them between the empty <span> tags.
main.js
$(function() {
  console.log("whee!")

  // ---- event handler ---- //
  $("#btn-click").click(function(e) {
    // grab the values from the input boxes, then append them to the DOM
    $(".person").empty().append($("input.person").val());
    $(".adjective").empty().append($("input.adjective").val());
    $(".noun").empty().append($("input.noun").val());
    $(".insect").empty().append($("input.insect").val());
    $(".noun2").empty().append($("input.plural-noun").val());
    $(".verb").empty().append($("input.verb").val());
  });

});
What’s going on?
Just like in the previous code -
.val()grabs the value from the form inputs..empty()removes any text from that specific class in the story..append()then adds the new value to the story.
This time I did not assign the values to variables; instead I used the inputted values as parameters for the .append() method.
Test this out. Did it work? Were the values added to the story? If all went well, they should have been.
main.js
Now, before we move on, let’s add some more functionality:
- First, we do not want the story to be initially displayed -
$("#story").hide(); - Next, we want to show the story after the button click - $(“#story”).show(); - and empty the form’s input boxes -
$(':input').val('');. - Finally, let’s go ahead and hit all the questions after the form is submitted so the user can just focus on the story -
$("#questions").hide();.
Update main.js with those additional methods:
$(function() {

  // hide the story from view
  $("#story").hide();

  // ---- event handler ---- //
  $("#btn-click").click(function(e) {

    // grab the values from the input boxes, then append them to the DOM
    $(".person").empty().append($("input.person").val());
    $(".adjective").empty().append($("input.adjective").val());
    $(".noun").empty().append($("input.noun").val());
    $(".insect").empty().append($("input.insect").val());
    $(".noun2").empty().append($("input.plural-noun").val());
    $(".verb").empty().append($("input.verb").val());

    // show the story
    $("#story").show();

    // empty the form's values
    $(':input').val('');

    // hide the questions
    $("#questions").hide();

  });

});
Let’s test out the functionality again. Enter values into the form and press Generate. You should see the following if all went well:
Please note: Instead of using jQuery,
$("#story").hide();to hide the story, you could also use CSS -#story {display: none;}
Step 7: Handle Another Event
Okay. Everything looks good. But what happens if the user wants to play again? Sure s/he could refresh the page, but let’s make it easier by adding another event handler.
main.js
$("#play-btn").click(function(e) {
  $("#questions").show();
  $("#story").hide();
});
Can you tell what’s happening here? Look at previous jQuery code that we added before if you need an explanation.
index.html
Finally, add in a button with the an id of play-btn right before the closing div, </div> in the story section:
<div>
  <button type="submit" class="btn btn-primary btn-lg" id="play-btn">Play Again?</button>
</div>
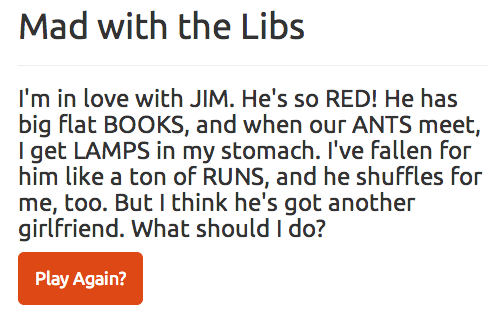
Test time.
All done?
Test the program out again. If all works out well, run along and play with your bestest of friends.
- Try it here - http://backwardsteps.com/madlibs/.
- Grab the repo here - http://github.com/mjhea0/jquery-madlibs
Challenges
Too easy? Need some challenges?
- As with all projects/problems, there are several ways of solving them. Implement a new means.
- Add unit and functional tests. Coverage too. What could you test? The question section is hidden after the button click. The event handler on the button click doesn’t fire unless all input boxes contain text.
- Allow users to add their own stories. Think about what type of medium you could use to store the data. JSON, perhaps? Then where would you store the JSON file? LocalStorage? MongoDB?
- Make it easy for two people to play one game together. One person would enter his/her answers, which would be stored. The inputs would clear. Then the next person would do the same. Finally, both stories would appear. Double the amount of laughs.
- ENTER button. How could you make it so the user could either click the button or press ENTER? (Add another even for the button click or move the submit button into the form tags and add a
.preventDefault()method to the JS file). - Could
.toggle()be used somehow instead of two different betweens? Maybe you could toggle the question to hide and the story to show, then vice-versa, with the same button?
What else?
Too hard? Start with the basics.
Read over the first four steps again make sure to write the actual code. DO NOT copy and paste. Read over it again if you have to for further understanding, then try to implement the Mad Libs game on your own, without looking at the remaining steps.
Have fun. Cheers!