Developing Microservices - Node, React, and Docker
In this post you will learn how to quickly spin up a reproducible development environment with Docker to manage a number of Node.js microservices.
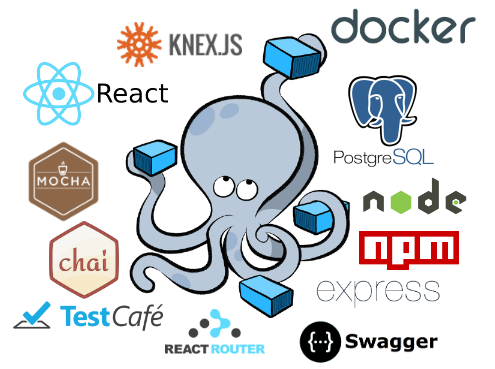
This post assumes prior knowledge of the following topics. Refer to the resources for more info:
| Topic | Resource |
|---|---|
| Docker | Get started with Docker |
| Docker Compose | Get started with Docker Compose |
| Node/Express API | Testing Node and Express |
| React | React Intro |
| TestCafe | Functional Testing With TestCafe |
| Swagger | Swagger and NodeJS |
NOTE: Looking for a slightly easier implementation? Check out my previous post - Developing and Testing Microservices With Docker.
Contents
- Objectives
- Architecture
- Project Setup
- Users Service
- Web Service - part 1
- Movies Service
- Web Service - part 2
- Workflow
- Test Setup
- Swagger Setup
- Next Steps
Objectives
By the end of this tutorial, you should be able to…
- Configure and run microservices locally with Docker and Docker Compose
- Utilize volumes to mount your code into a container
- Run unit and integration tests inside a Docker container
- Test the entire set of services with functional, end-to-end tests
- Debug a running Docker container
- Enable services running in different containers to talk to one other
- Secure your services via JWT-based authentication
- Work with React running inside a Docker Container
- Configure Swagger to interact with a service
Architecture
The end goal of this post is to organize the technologies from the above image into the following containers and services:
| Name | Service | Container | Tech |
|---|---|---|---|
| Web | Web | web | React, React-Router |
| Movies API | Movies | movies | Node, Express |
| Movies DB | Movies | movies-db | Postgres |
| Swagger | Movies | swagger | Swagger UI |
| Users API | Users | users | Node, Express |
| Users DB | Users | users-db | Postgres |
| Functional Tests | Test | n/a | TestCafe |
Let’s get started!
Project Setup
Start by cloning the base project and then checking out the first tag:
$ git clone https://github.com/mjhea0/microservice-movies
$ cd microservice-movies
$ git checkout tags/v1
Overall project structure:
.
├── services
│   ├── movies
│   │   ├── src
│   │   │   └── db
│   │   └── swagger
│   ├── users
│   │   └── src
│   │       └── db
│   └── web
└── tests
Before we add Docker, be sure to review the code so that you have a basic understanding of how everything works. Feel free to test these services as well…
Users:
- Navigate to “services/users”
npm install- update the
startscript within package.json to"gulp --gulpfile gulpfile.js" npm start- Open http://localhost:3000/users/ping in your browser
Movies:
- Navigate to “services/movies”
npm install- update the
startscript within package.json to"gulp --gulpfile gulpfile.js" npm start- Open http://localhost:3000/movies/ping in your browser
Web:
- Navigate to “services/web”
npm installnpm start- Open http://localhost:3006 in your browser. You should see the log in page.
Next, add a docker-compose.yml file to the project root. This file is used by Docker Compose to link multiple services together. With one command it will spin up all the containers we need and enable them to communicate with one another (as needed).
With that, let’s get each service going, making sure to test as we go…
Users Service
We’ll start with the database since the API is dependent on it being up…
Database
First, add a Dockerfile to “services/users/src/db”:
FROM postgres

# run create.sql on init
ADD create.sql /docker-entrypoint-initdb.d
Here, we extend the official Postgres image by adding a SQL file to the “docker-entrypoint-initdb.d” directory in the container, which will execute on init.
Then update the docker-compose.yml file:
version: '2.1'

services:

  users-db:
    container_name: users-db
    build: ./services/users/src/db
    ports:
      - '5433:5432' # expose ports - HOST:CONTAINER
    environment:
      - POSTGRES_USER=postgres
      - POSTGRES_PASSWORD=postgres
    healthcheck:
      test: exit 0
This config will create a container called users-db, from the Dockerfile found in “services/users/src/db”. (Directories are relative to the docker-compose.yml file.)
Once spun up, environment variables will be added and an exit code of 0 will be sent after it’s successfully up and running. Postgres will be available on port 5433 on the host machine and on port 5432 for other services.
NOTE: Use
expose, rather thanports, if you just want Postgres available to other services but not the host machine:expose: - "5432"
Take note of the version used - 2.1. This does not relate directly to the version of Docker Compose installed; instead, it specifies the file format that you want to use.
Fire up the container:
$ docker-compose up --build -d users-db
Once up, let’s run a quick sanity check. Enter the shell:
$ docker-compose run users-db bash
Then run env to ensure that the proper environment variables are set. You can also check out the “docker-entrypoint-initdb.d” directory:
# cd docker-entrypoint-initdb.d/
# ls
create.sql
exit when done.
API
Turning to the API, add a Dockerfile to “services/users”, making sure to review the comments:
FROM node:latest

# set working directory
RUN mkdir /usr/src/app
WORKDIR /usr/src

# add `/usr/src/node_modules/.bin` to $PATH
ENV PATH /usr/src/node_modules/.bin:$PATH

# install and cache app dependencies
ADD package.json /usr/src/package.json
RUN npm install

# start app
CMD ["npm", "start"]
NOTE: Be sure to take advantage of Docker’s layered cache system, to speed up build times, by adding the package.json and installing the dependencies before adding the app’s source files. For more on this, check out Building Efficient Dockerfiles - Node.js.
Then add the users-service to the docker-compose.yml file:
users-service:
  container_name: users-service
  build: ./services/users/
  volumes:
    - './services/users:/usr/src/app'
    - './services/users/package.json:/usr/src/package.json'
  ports:
    - '3000:3000' # expose ports - HOST:CONTAINER
  environment:
    - DATABASE_URL=postgres://postgres:postgres@users-db:5432/users_dev
    - DATABASE_TEST_URL=postgres://postgres:postgres@users-db:5432/users_test
    - NODE_ENV=${NODE_ENV}
    - TOKEN_SECRET=changeme
  depends_on:
    users-db:
      condition: service_healthy
  links:
    - users-db
What’s happening here?
volumes: volumes are used to mount a directory inside a container so that you can make modifications to the code without having to rebuild the image. This should be a default in your local development environment so you quickly get feedback on code changes.depends_on: depends_on specifies the order in which to start services. In this case, theusers-servicewill wait for theusers-dbto fire up successfully (with an exit code of0) before it starts.links: With links you can link to services running in other containers. So, with this config, code inside theusers-servicewill be able to access the database viausers-db:5432.
NOTE: Curious about the difference between
depends_onandlinks? Check out the following Stack Overflow discussion for more info.
Set the NODE_ENV environment variable:
$ export NODE_ENV=development
Build the image and spin up the container:
$ docker-compose up --build -d users-service
NOTE: Keep in mind that Docker Compose handles both the build and run times. This can be confusing. For example, take a look at the current docker-compose.yml file - What is happening at the build time? How about the run time? How do you know?
Once up, create a new file in the project root called init_db.sh and add the Knex migrate and seed commands:
#!/bin/sh

docker-compose run users-service knex migrate:latest --env development --knexfile app/knexfile.js
docker-compose run users-service knex seed:run --env development --knexfile app/knexfile.js
Then apply the migrations and add the seed:
$ sh init_db.sh
Using environment: development
Batch 1 run: 1 migrations
/src/src/db/migrations/20170504191016_users.js
Using environment: development
Ran 1 seed files
/src/src/db/seeds/users.js
Test:
| Endpoint | HTTP Method | CRUD Method | Result |
|---|---|---|---|
| /users/ping | GET | READ | pong |
| /users/register | POST | CREATE | add a user |
| /users/login | POST | CREATE | log in a user |
| /users/user | GET | READ | get user info |
$ http POST http://localhost:3000/users/register username=foo password=bar
$ http POST http://localhost:3000/users/login username=foo password=bar
NOTE:
httpin the above commands is part of the HTTPie library, which is a wrapper on top of cURL.
In both cases you should see a status of success along with a token, i.e. -
{
    "status": "success",
    "token": "eyJ0eXAiOiJKV1QiLCJhbGciOiJIUzI1NiJ9"
}
Finally, run the unit and integration tests:
$ docker-compose run users-service npm test
You should see:
routes : index
  GET /does/not/exist
    ✓ should throw an error

routes : users
  POST /users/register
    ✓ should register a new user (178ms)
  POST /users/login
    ✓ should login a user (116ms)
    ✓ should not login an unregistered user
    ✓ should not login a valid user with incorrect password (125ms)
  GET /users/user
    ✓ should return a success (114ms)
    ✓ should throw an error if a user is not logged in

auth : helpers
  comparePass()
    ✓ should return true if the password is correct (354ms)
    ✓ should return false if the password is correct (315ms)
    ✓ should return false if the password empty (305ms)

auth : local
  encodeToken()
    ✓ should return a token
  decodeToken()
    ✓ should return a payload


12 passing (4s)
Check the test specs for more info. That’s it! Let’s move on to the web service…
Web Service - part 1
With our users service up and running, we can turn our attention to the client-side and spin up the React app inside a container to test authentication.
NOTE: The React code is ported from intro-react-redux-omdb and communikey written by Charlie Blackstock and Evan Moore, respectively - two of my former students.
Add a Dockerfile to “services/web”:
FROM node:latest

# set working directory
RUN mkdir /usr/src/app
WORKDIR /usr/src/app

# add `/usr/src/app/node_modules/.bin` to $PATH
ENV PATH /usr/src/app/node_modules/.bin:$PATH

# install and cache app dependencies
ADD package.json /usr/src/app/package.json
RUN npm install
RUN npm install react-scripts@0.9.5 -g

# start app
CMD ["npm", "start"]
As of 05/10/2017 the OMDb API is private, so you have to donate at least $1 to gain access. Once you have an API Key, update the API_URL in services/web/src/App.jsx:
const API_URL = 'http://www.omdbapi.com/?apikey=addyourkey&s='
Then update the docker-compose.yml file like so:
web-service:
  container_name: web-service
  build: ./services/web/
  volumes:
    - './services/web:/usr/src/app'
    - '/usr/src/app/node_modules'
  ports:
    - '3007:3006' # expose ports - HOST:CONTAINER
  environment:
    - NODE_ENV=${NODE_ENV}
  depends_on:
    users-service:
      condition: service_started
  links:
    - users-service
NOTE: To prevent the volume -
/usr/src/app- from overriding the package.json, we used a data volume -/usr/src/app/node_modules. This may or may not be necessary, depending on the order in which you set up your image and containers. Check out Getting npm packages to be installed with docker-compose for more.
Build the image and fire up the container:
$ docker-compose up --build -d web-service
NOTE: To avoid dealing with too much configuration (babel and webpack), the React app uses Create React App.
Open your browser and navigate to http://localhost:3007. You should see the login page:
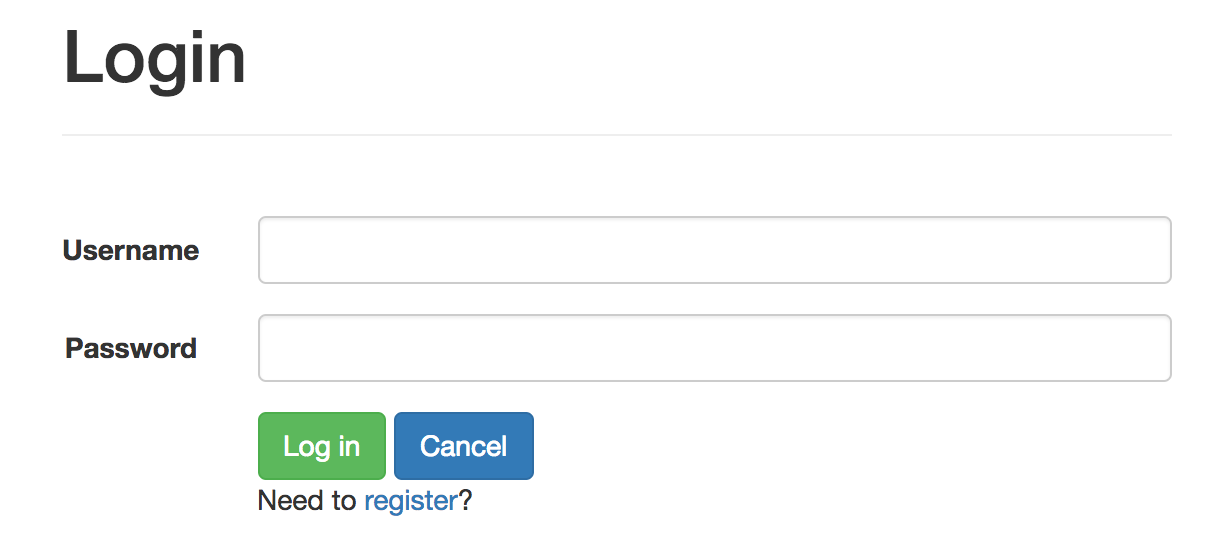
Log in with -
- username:
foo - password:
bar
Once logged in you should see:

Within services/web/src/App.jsx, let’s take a quick look at the AJAX request in the loginUser() method:
loginUser (userData, callback) {
  /*
    why? http://localhost:3000/users/login
    why not? http://users-service:3000/users/login
   */
  return axios.post('http://localhost:3000/users/login', userData)
  .then((res) => {
    window.localStorage.setItem('authToken', res.data.token)
    window.localStorage.setItem('user', res.data.user)
    this.setState({ isAuthenticated: true })
    this.createFlashMessage('You successfully logged in! Welcome!')
    this.props.history.push('/')
    this.getMovies()
  })
  .catch((error) => {
    callback('Something went wrong')
  })
}
Why do we use localhost rather than the name of the container, users-service? This request is originating outside the container, on the host. Keep in mind, that if, this request was originating inside the container, we would need to use the container name rather than localhost, since localhost would refer back to the container itself in that situation.
Make sure you can log out and register as well.
Next, let’s spin up the movies service so that end users can save movies to a collection…
Movies Service
Set up for the movies service is nearly the same as the users service. Try this on your own to check your understanding:
- Database
- add a Dockerfile
- update the docker-compose.yml
- spin up the container
- test
- API
- add a Dockerfile
- update the docker-compose.yml (make sure to link the service with the database and the users service and update the exposed ports -
3001for the api,5434for the db) - spin up the container
- apply migrations and seeds
- test
NOTE: Need help? Grab the code from the v2 tag of the microservice-movies repo.
The movies database image should take much less time to build than the users database. Why?
With the containers up, let’s test out the endpoints…
| Endpoint | HTTP Method | CRUD Method | Result |
|---|---|---|---|
| /movies/ping | GET | READ | pong |
| /movies/user | GET | READ | get all movies by user |
| /movies | POST | CREATE | add a single movie |
Start with opening the browser to http://localhost:3001/movies/ping. You should see pong! Try http://localhost:3001/movies/user:
{
  "status": "Please log in"
}
Since you need to be authenticated to access the other routes, let’s test them out by running the integration tests:
$ docker-compose run movies-service npm test
You should see:
routes : index
  GET /does/not/exist
    ✓ should throw an error

Movies API Routes
  GET /movies/ping
    ✓ should return "pong"
  GET /movies/user
    ✓ should return saved movies
  POST /movies
    ✓ should create a new movie


4 passing (818ms)
Check the test specs for more info.
Web Service - part 2
Turn to the docker-compose.yml file. Update the links and depends_on keys for the web-service:
depends_on:
  users-service:
    condition: service_started
  movies-service:
    condition: service_started
links:
  - users-service
  - movies-service
Why?
Next, update the container:
$ docker-compose up -d web-service
Let’s test this out in the browser! Open http://localhost:3007/. Register a new user and then add some movies to the collection.
Be sure to view the collection as well:

Open services/movies/src/routes/_helpers.js and take note of the ensureAuthenticated() method:
let ensureAuthenticated = (req, res, next) => {
  if (!(req.headers && req.headers.authorization)) {
    return res.status(400).json({ status: 'Please log in' });
  }
  const options = {
    method: 'GET',
    uri: 'http://users-service:3000/users/user',
    json: true,
    headers: {
      'Content-Type': 'application/json',
      Authorization: `Bearer ${req.headers.authorization.split(' ')[1]}`,
    },
  };
  return request(options)
  .then((response) => {
    req.user = response.user;
    return next();
  })
  .catch((err) => { return next(err); });
};
Why does the uri point to users-service and not localhost?
Workflow
Start by checking out the Workflow section from Developing and Testing Microservices With Docker. Experiment with live reloading on a code change and debugging a running container with console.log.
Add a header to the collection page:
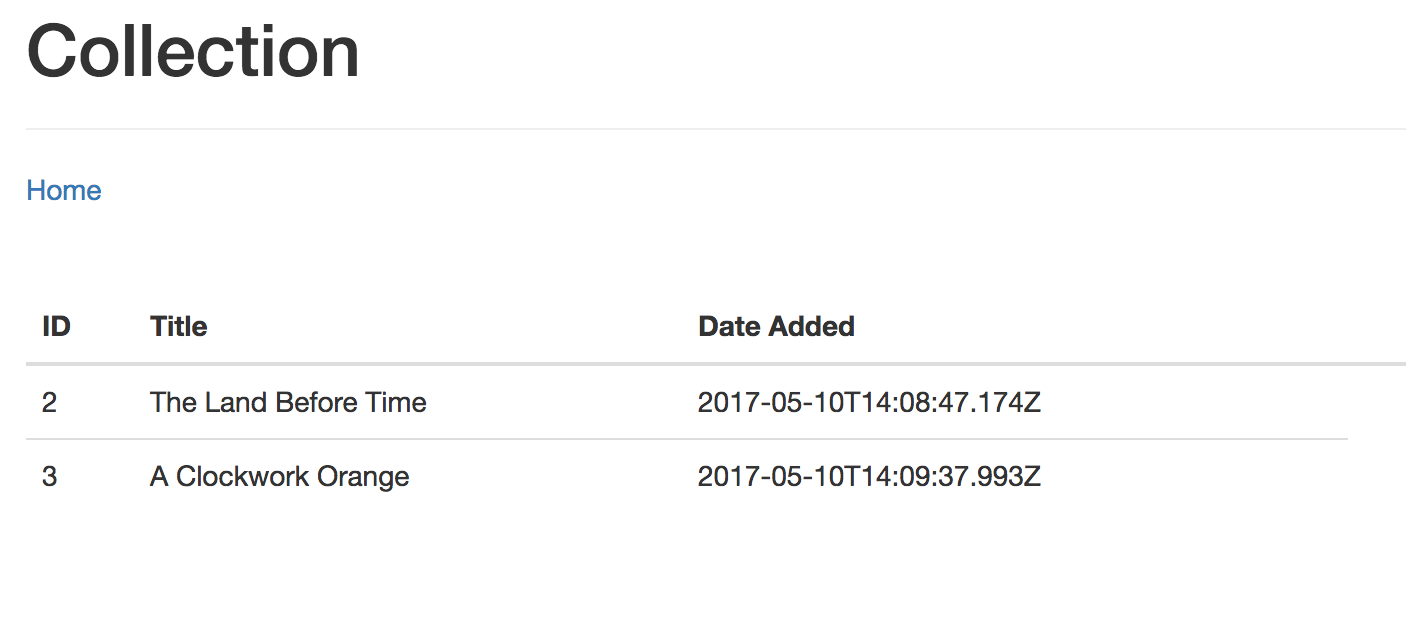
Run the logs - docker-compose logs -f web-service - and then make a change to one of the components that breaks compilation:
web-service       | Compiling...
web-service       | Failed to compile.
web-service       |
web-service       | Error in ./src/components/SavedMovies.jsx
web-service       |
web-service       | /usr/src/app/src/components/SavedMovies.jsx
web-service       |   10:13  error  'Link' is not defined  react/jsx-no-undef
web-service       |
web-service       | ✖ 1 problem (1 error, 0 warnings)
web-service       |
web-service       |
Correct the error:
web-service       |
web-service       | Compiling...
web-service       | Compiled successfully!
Continue to experiment with adding and updating the React app until you feel comfortable working with it inside the container.
Test Setup
Thus far we’ve only tested each individual microservice with unit and integration tests. Let’s turn our attention to functional, end-to-end tests to test the entire system. For this, we’ll use TestCafe.
NOTE: Don’t want to use TestCafe? Check out the code for using Mocha, Chai, Request, and Cheerio (all within a container) for testing.
Let’s be lazy and install TestCafe globally:
$ npm install testcafe@0.15.0 -g
Then run the tests:
$ testcafe firefox tests/**/*.js
You should see:
testcafe firefox tests/**/*.js
 Running tests in:
 - Firefox 53.0.0 / Mac OS X 10.11.0

 /login
 ✓ users should be able to log in and out


 1 passed (3s)
NOTE: Interested in running the tests from within a container? Check out the official TestCafe docs for more info on using TestCafe with Docker.
To simplify the test workflow, add a test.sh file to the project root:
#!/bin/bash

fails=''

inspect() {
  if [ $1 -ne 0 ] ; then
    fails="${fails} $2"
  fi
}

docker-compose run users-service npm test
inspect $? users-service

docker-compose run movies-service npm test
inspect $? movies-service

testcafe firefox tests/**/*.js
inspect $? e2e

if [ -n "${fails}" ];
  then
    echo "Tests failed: ${fails}"
    exit 1
  else
    echo "Tests passed!"
    exit 0
fi
Run the tests:
$ sh test.sh
Swagger Setup
Add a Dockerfile to “services/movies/swagger”:
FROM node:latest

# set working directory
RUN mkdir /usr/src/app
WORKDIR /usr/src/app

# add `/usr/src/node_modules/.bin` to $PATH
ENV PATH /usr/src/app/node_modules/.bin:$PATH

# install and cache app dependencies
ADD package.json /usr/src/app/package.json
RUN npm install

# start app
CMD ["npm", "start"]
Update docker-compose.yml:
swagger:
  container_name: swagger
  build: ./services/movies/swagger/
  volumes:
    - './services/movies/swagger:/usr/src/app'
    - '/usr/src/app/node_modules'
  ports:
    - '3003:3001' # expose ports - HOST:CONTAINER
  environment:
    - NODE_ENV=${NODE_ENV}
  depends_on:
    users-service:
      condition: service_started
    movies-service:
      condition: service_started
  links:
    - users-service
    - movies-service
Fire it up:
$ docker-compose up -d --build swagger
Navigate to http://localhost:3003/docs and test it out:
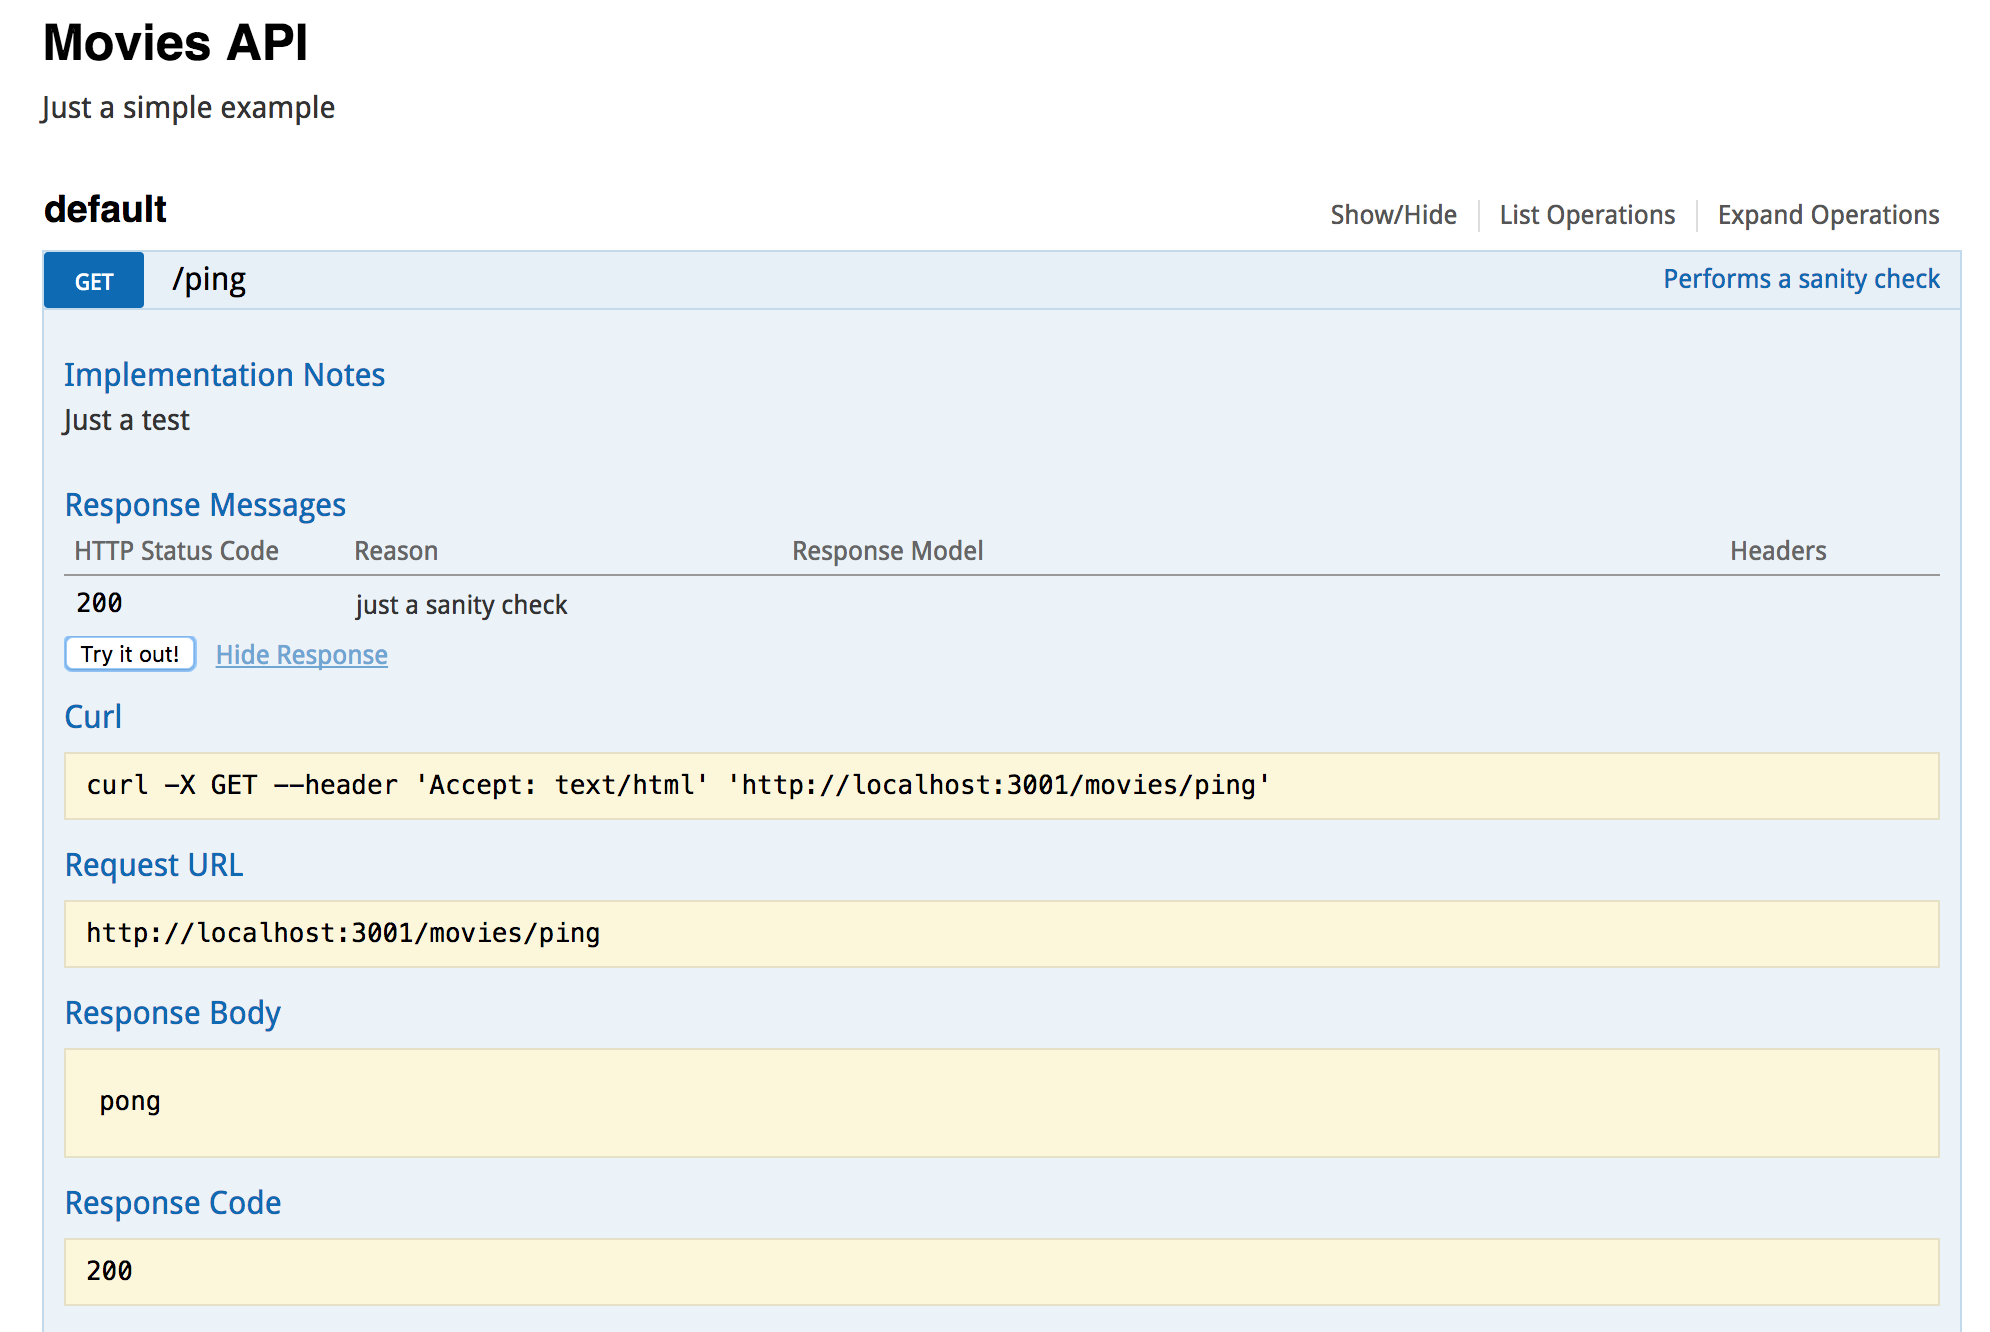
Now you just need to incorporate support for JWT-based auth and add the remaining endpoints!
Next Steps
What’s next?
- React App - The React app could use some love. Add styles. Fix bugs. Update the flash messages so that only one is displayed at a time. Write tests. Build new features. Add Redux. The sky’s the limit. Contact me if you’d like to pair!
- Swagger - Add JWT-based auth and add additional endpoints from the movies service.
- Dockerfiles - Read Best practices for writing Dockerfiles, by the Docker team, and refactor as necessary.
- Production - Want to deploy on AWS? Check out the On-Demand Environments With Docker and AWS ECS blog post.
Grab the final code from the v2 tag of the microservice-movies repo. Please add questions and/or comments below. There’s slides too! Check them out here, if interested.