Deploying a Jekyll Site to Netlify with Docker and GitLab CI
This is a step-by-step guide covering how to automatically deploy a Jekyll site to Netlify using Docker and GitLab CI/CD.
Contents
Assumptions
This post assumes that have already set up a GitLab repository and a Netlify site. Your Jekyll site should have the following project structure as well:
├── .gitignore
└── src
    ├── 404.html
    ├── Gemfile
    ├── Gemfile.lock
    ├── _config.yml
    ├── _posts
    ├── about.markdown
    └── index.markdown
Docker Setup
Let’s start by setting up a Dockerfile based on the jekyll/jekyll Docker image to manage a compatible Ruby version for Jekyll along with bundler and all the RubyGems.
Add the Dockerfile to the project root:
FROM jekyll/jekyll:3.8.0

WORKDIR /tmp

ENV BUNDLER_VERSION 2.1.4
ENV NOKOGIRI_USE_SYSTEM_LIBRARIES 1

ADD ./src/Gemfile /tmp/
ADD ./src/Gemfile.lock /tmp/

RUN gem install bundler -i /usr/gem -v 2.1.4
RUN bundle install

WORKDIR /srv/jekyll
Build and tag the image:
$ docker build --tag jekyll-docker .
Once built, spin up the container like so to serve up the site locally on port 4000:
$ docker run \
  -d -v $PWD/src:/srv/jekyll -p 4000:4000 \
  jekyll-docker bundle exec jekyll serve -H 0.0.0.0
Make sure the site is up at http://localhost:4000/.
Bring down the container once done:
sh docker stop $(docker ps -q --filter ancestor=jekyll-docker)
GitLab Build
With that, to configure the GitLab CI pipeline associated with the repo, add a .gitlab-ci.yml file to the project root:
image: docker:stable

services:
  - docker:dind

stages:
  - build

variables:
  IMAGE: ${CI_REGISTRY}/${CI_PROJECT_NAMESPACE}/${CI_PROJECT_NAME}

build:
  stage: build
  script:
    - docker login -u $CI_REGISTRY_USER -p $CI_JOB_TOKEN $CI_REGISTRY
    - docker pull $IMAGE:latest || true
    - docker build --cache-from $IMAGE:latest --tag $IMAGE:latest .
    - docker push $IMAGE:latest
    - docker run -v $PWD/src:/srv/jekyll $IMAGE:latest bundle exec jekyll build
Here, using Docker-in-Docker, we defined a single stage called build that:
- Logs in to the GitLab Container Registry
- Pulls the previously pushed image (if it exists)
- Builds and tags the new image
- Pushes the image up to the GitLab Container Registry
- Creates a Jekyll build
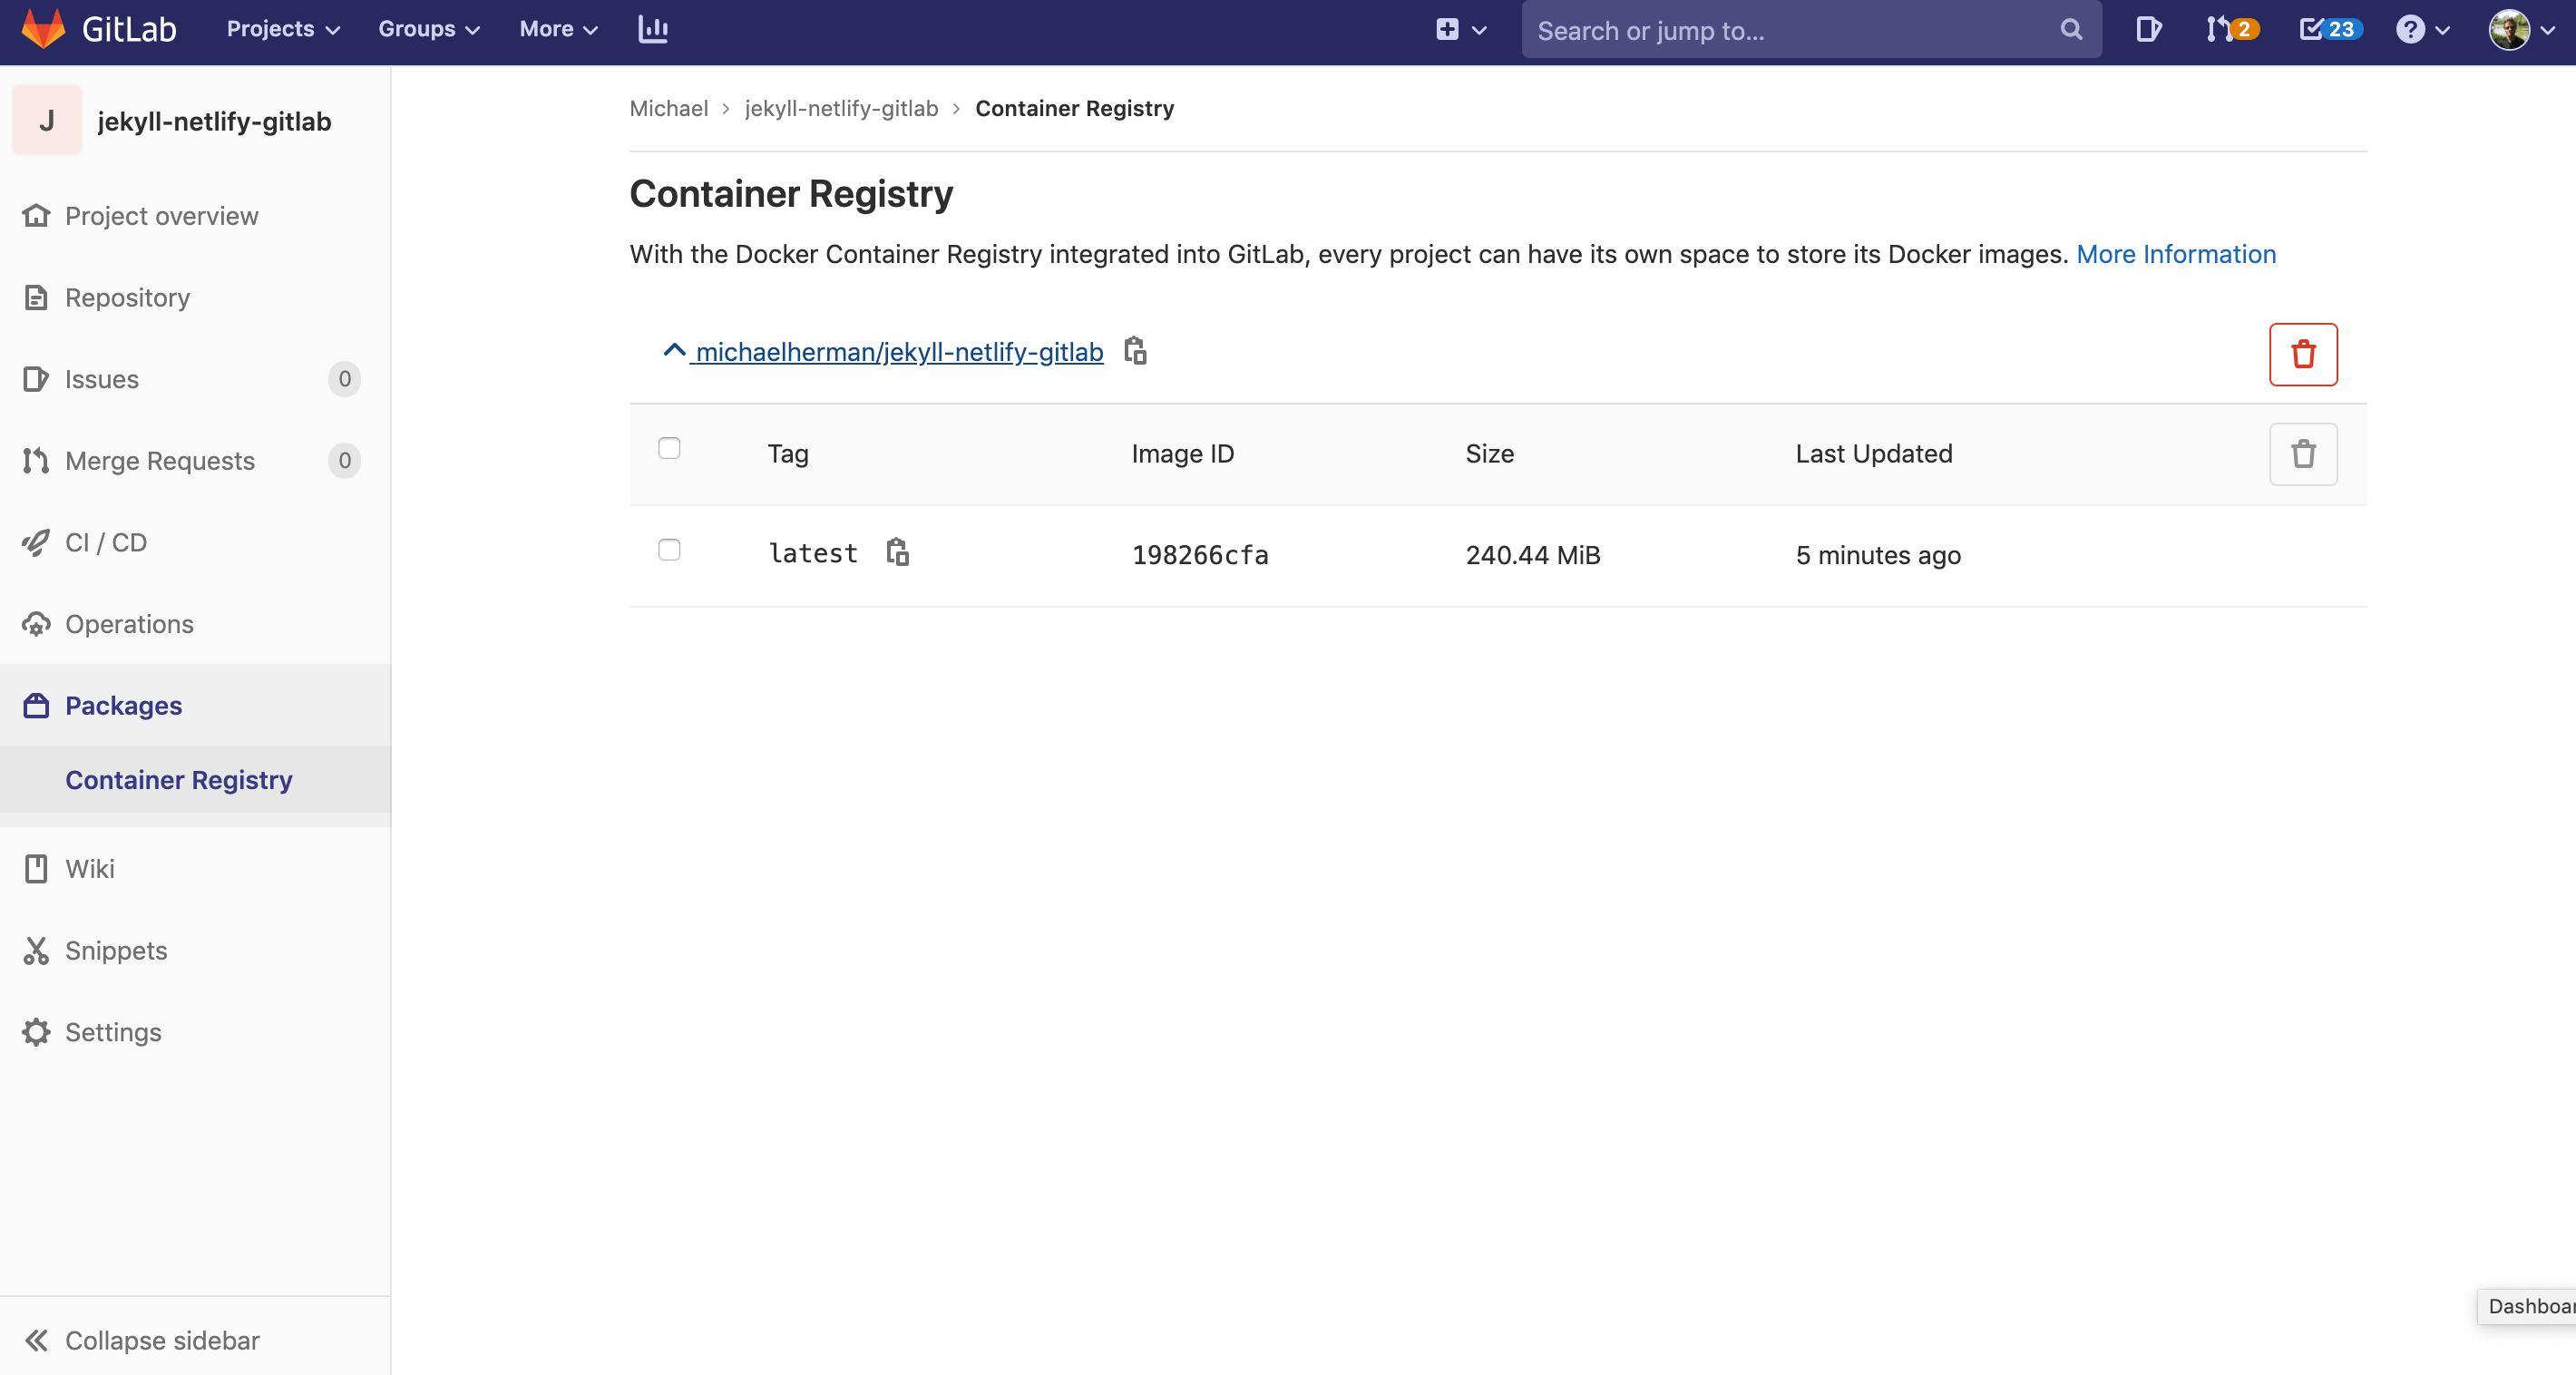
Commit your code and push it up to GitLab. This should trigger a new build, which should pass. You should also see the image in the Container Registry:
This first build should take between five to six minutes to complete. Subsequent builds will be much faster since they will leverage Docker layer caching.
For more on caching check out Faster CI Builds with Docker Cache.
Netlify API Deployment
Next, to use the Netlify API to deploy the Jekyll site, add the following to a deploy.sh script in the project root:
#!/usr/bin/env bash

zip -r website.zip ./src/_site

curl -H "Content-Type: application/zip" \
      -H "Authorization: Bearer $NETLIFY_ACCESS_TOKEN" \
      --data-binary "@website.zip" \
      https://api.netlify.com/api/v1/sites/$NETLIFY_SUBDOMAIN.netlify.com/deploys
To test locally, you’ll first need to create an access token (if you haven’t already done so), which can be obtained from either the command line or the Netlify UI.
Once obtained, set it as an environment variable along with your Netlify subdomain:
$ export NETLIFY_ACCESS_TOKEN=<your_access_token>
$ export NETLIFY_SUBDOMAIN=<your_subdomain>
Generate the static files:
$ docker run \
  -v $PWD/src:/srv/jekyll -p 4000:4000 \
  jekyll-docker bundle exec jekyll build
Make sure the “src/_site” directory was created before deploying the site:
$ chmod +x deploy.sh
$ ./deploy.sh
So, after zipping the “src/_site” directory, we sent a POST request to https://api.netlify.com/api/v1/sites/$NETLIFY_SUBDOMAIN.netlify.com/deploys with the zip file in the HTTP request body.
Make sure the site was deployed before moving on.
GitLab Deploy
Finally, to automate the deploy, add a new stage to the .gitlab-ci.yml file, called deploy, to deploy the site to Netlify after a successful build:
image: docker:stable

services:
  - docker:dind

stages:
  - build
  - deploy

variables:
  IMAGE: ${CI_REGISTRY}/${CI_PROJECT_NAMESPACE}/${CI_PROJECT_NAME}

build:
  stage: build
  script:
    - docker login -u $CI_REGISTRY_USER -p $CI_JOB_TOKEN $CI_REGISTRY
    - docker pull $IMAGE:latest || true
    - docker build --cache-from $IMAGE:latest --tag $IMAGE:latest .
    - docker push $IMAGE:latest
    - docker run -v $PWD/src:/srv/jekyll $IMAGE:latest bundle exec jekyll build
  artifacts:
    paths:
      - src/_site

deploy:
  stage: deploy
  script:
    - apk add --update zip curl
    - chmod +x ./deploy.sh
    - /bin/sh ./deploy.sh


  artifacts:
    paths:
      - src/_site
Take note of the new artifacts definition added to the build stage:
artifacts:
  paths:
    - src/_site
If the build stage succeeds, the generated static files from the src/_site directory – the result of docker run -v $PWD/src:/srv/jekyll $IMAGE:latest bundle exec jekyll build – will be passed on to subsequent stages.
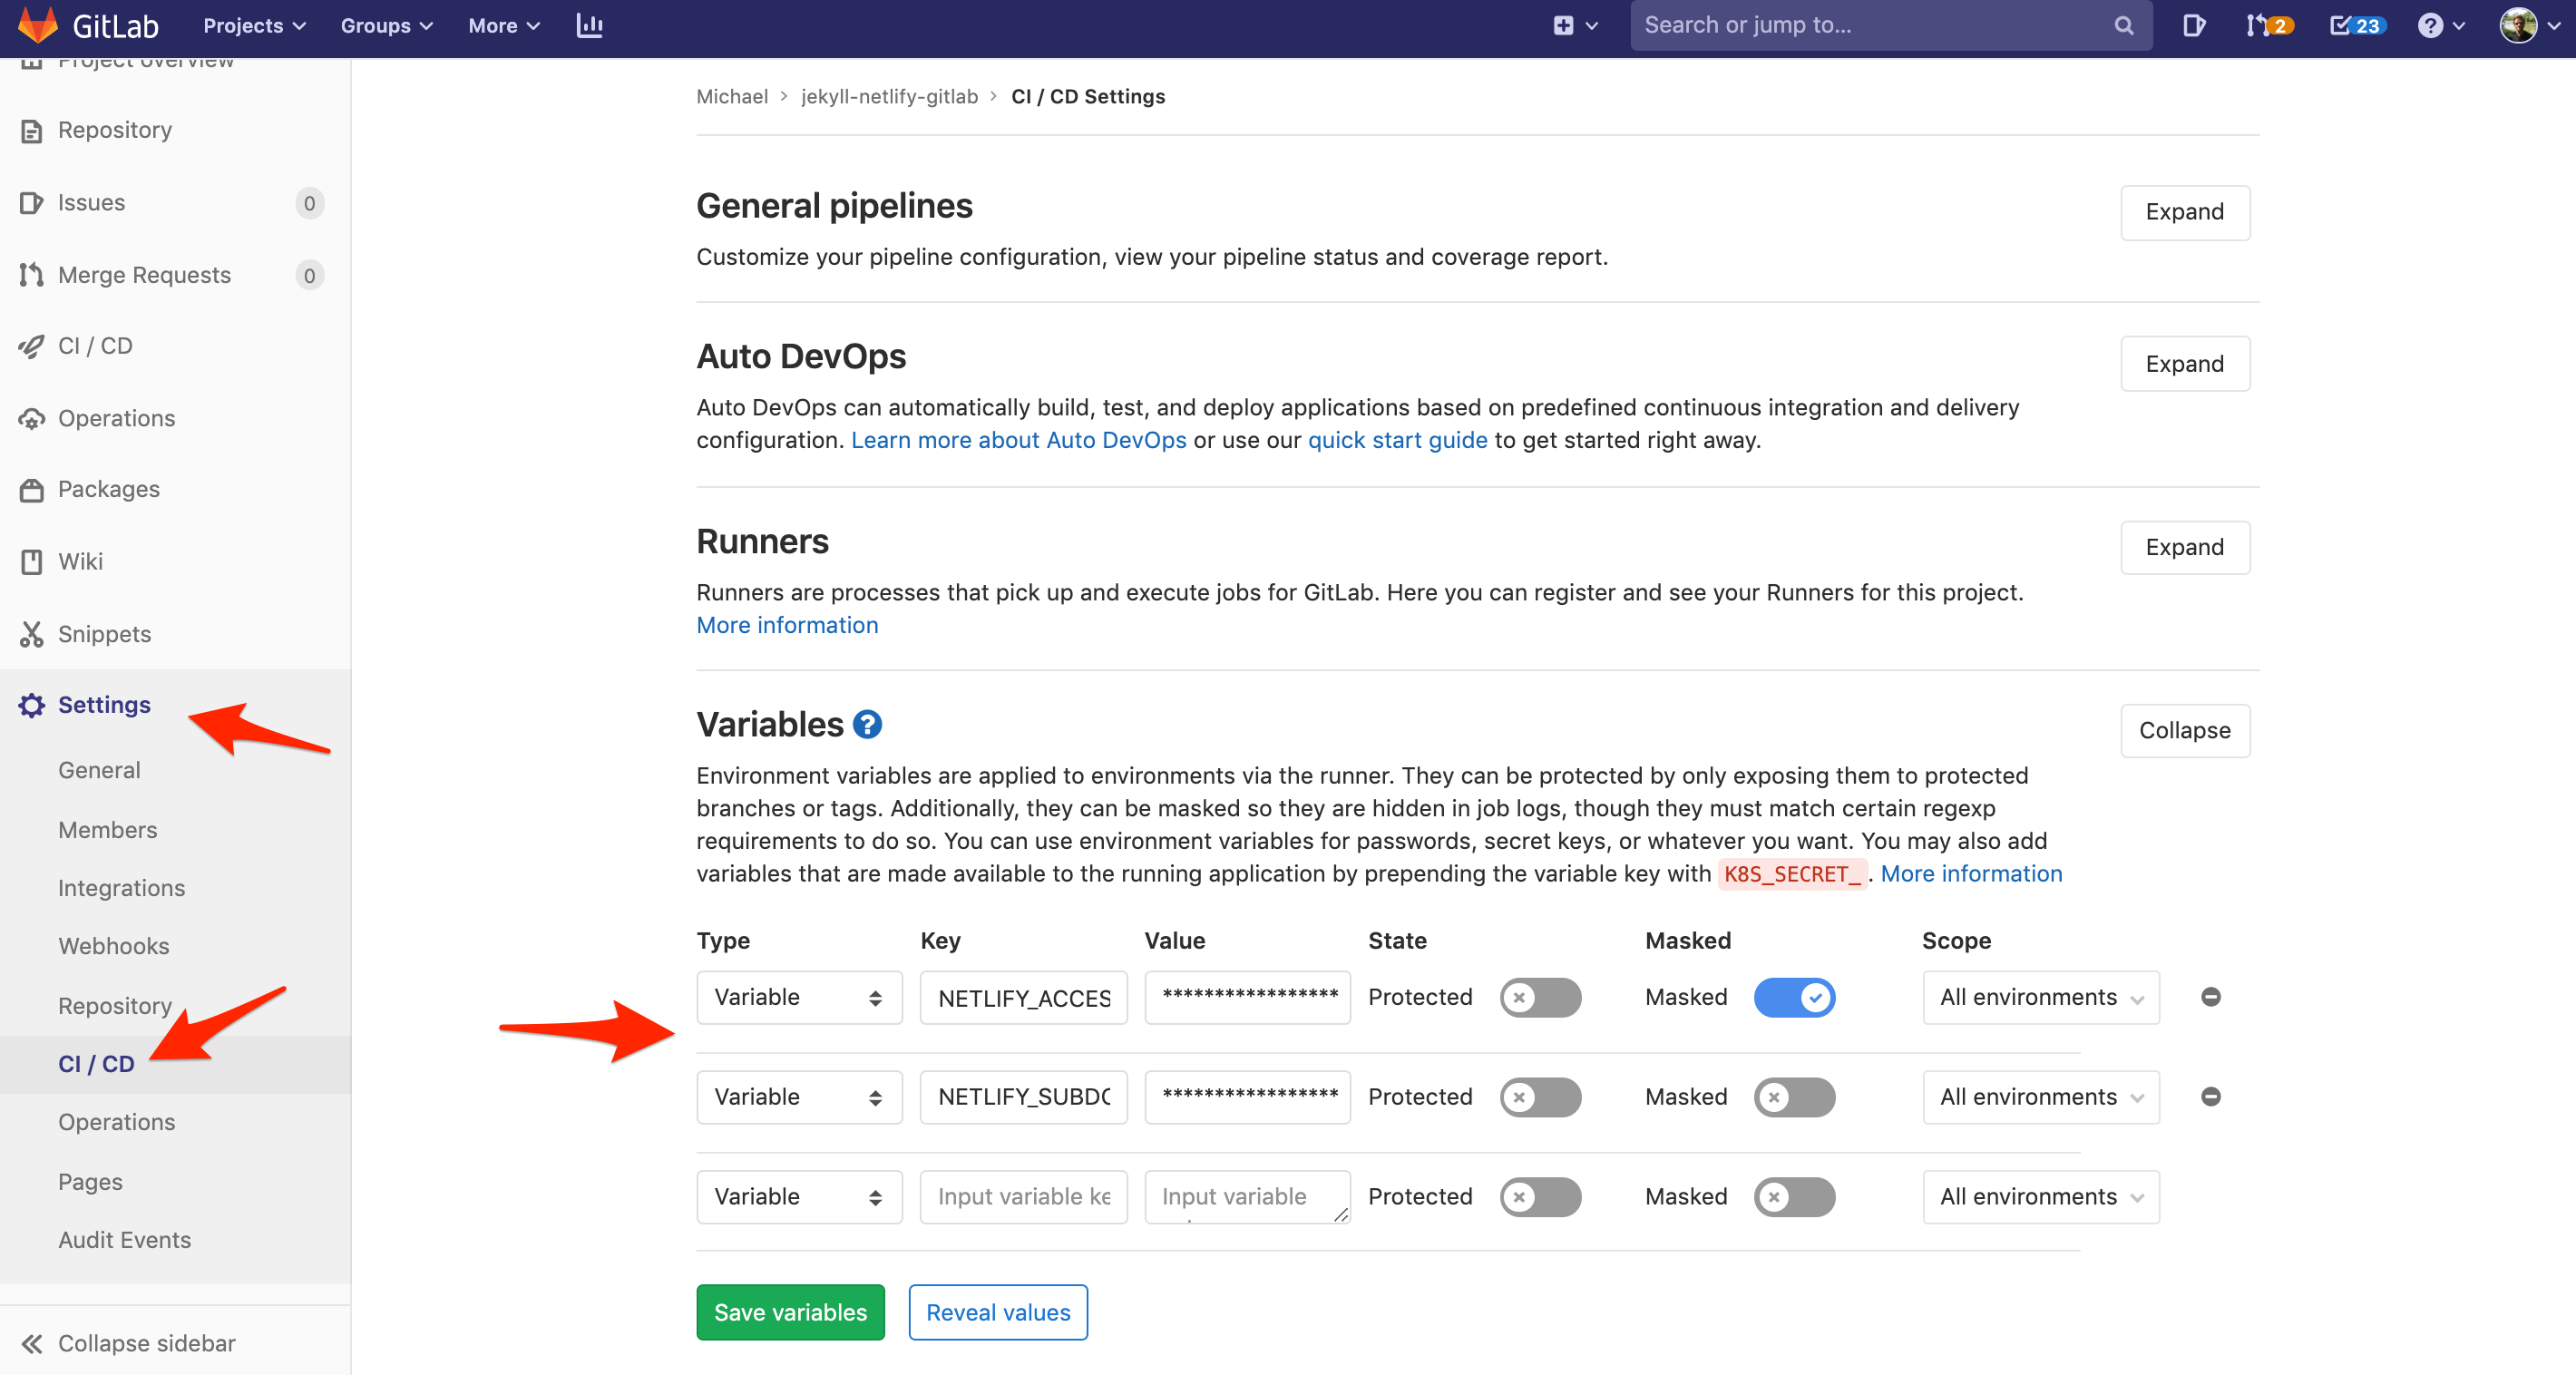
Add the NETLIFY_ACCESS_TOKEN and NETLIFY_SUBDOMAIN variables to your project’s CI/CD settings: Settings > CI / CD > Variables:
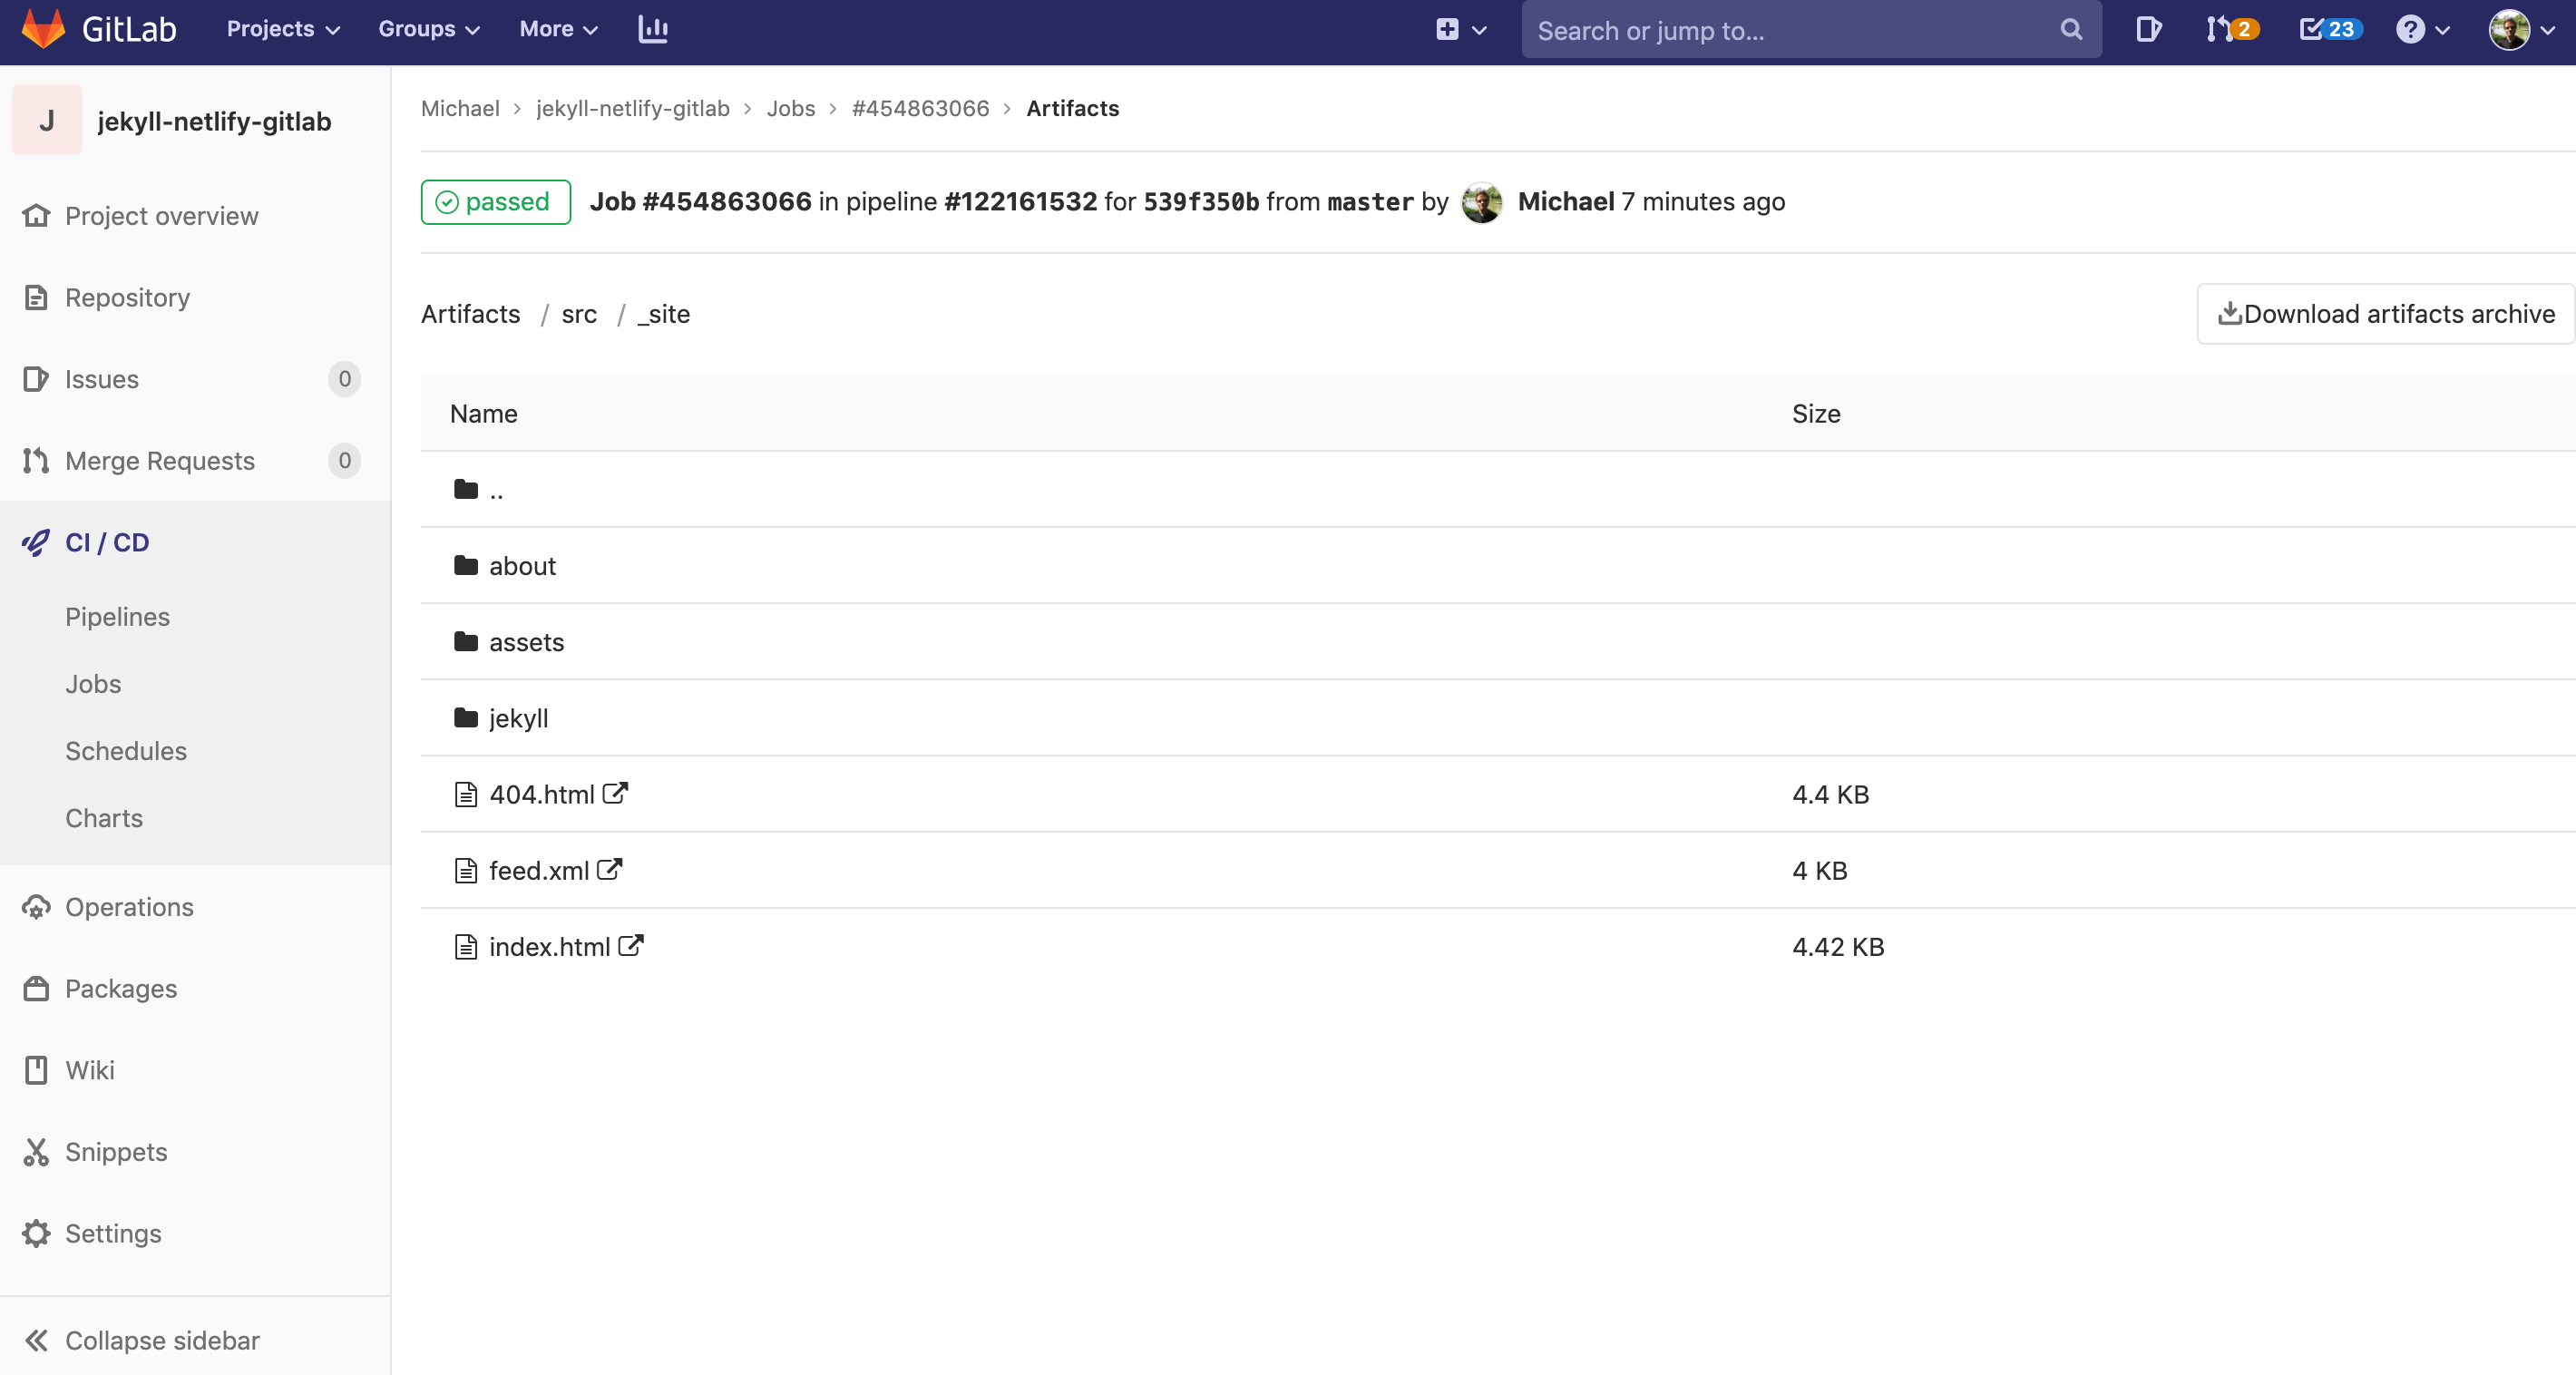
Commit your code and push it up again to GitLab to trigger a new build. After the build stage completes, you should be able to see the artifact on the job page:
The site should be deployed during the deploy stage.
You can find the code in the jekyll-netlify-gitlab repo on GitLab.