Crash Course in web2py (part 4 - managing form records)
Alright. In this tutorial I’ll show you how to modify the controller so that the end user can update and delete records. At this point, I assume:
- You have web2py already installed => part 1
- You created the skeleton web form => part 2
- You added data validation (with the help of Han Solo) => part 3
Let’s begin …
(1) Launch the server. (2) Go to the admin interface. (3) Edit the “form” application.
Contents
Controller
Add the following code to default.py just before the SQLFORM function, then add the variable to the function itself:
update = db.register(request.args(0))
form = SQLFORM(db.register, update)
Essentially, request.args() pulls up a user record associated with a specific unique ID.
Test
Test this out by adding a new record to the database @ http://127.0.0.1:8000/form/default/display_your_form.html. Make note of the unique id in the Accepted Fields section.
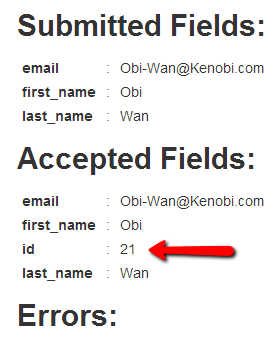
Now append that unique id to the end of the base URL - e.g., http://127.0.0.1:8000/form/default/display_your_form/21 - and the record should appear on a new page, which the user can update.
Please note: you can add writable=False or readable=False to the fields in the database to prevent a user from either editing or viewing a particular field. In the example below, I added writable=False to the first_name field.
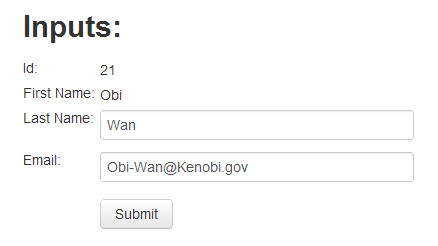
So, now the user can only edit the last name and email fields.
Moving on, for this process to work right, the user making the edits must know the unique id beforehand, which is unrealistic. web2py has a solution for that - grid.
Controller
The grid method is just wonderful. You have to see it to believe it. Quickly now, add the following function to default.py:
def all_records():
    grid = SQLFORM.grid(db.register,user_signature=False)
    return locals()
Navigate to the following URL - http://127.0.0.1:8000/form/default/all_records
Wow.
The end user can now perform the CRUD functions as well as search and sort all the records in the database - and it literally took twenty seconds to add this functionality. You can, of course, also require user authentication so only certain users can edit, while other users have read-only access.
Model
Finally, let’s add two more validators to the form. Go to your database.
I want the user to validate his/her email address and I want it to be unique, so update db.py with the following code:
db = DAL('sqlite://webform.sqlite')
db.define_table('register',
    Field('first_name', requires=[IS_NOT_EMPTY(), IS_ALPHANUMERIC()]),
    Field('last_name', requires=[IS_NOT_EMPTY(), IS_ALPHANUMERIC()]),
    Field('email', unique=True, requires=[IS_NOT_EMPTY(), IS_EMAIL()]),
    Field('email_validate',requires=IS_EQUAL_TO(request.vars.email)))
db.register.email.requires=IS_NOT_IN_DB(db,'register.email')
Take note of lines 5, 6, and 7.
Test
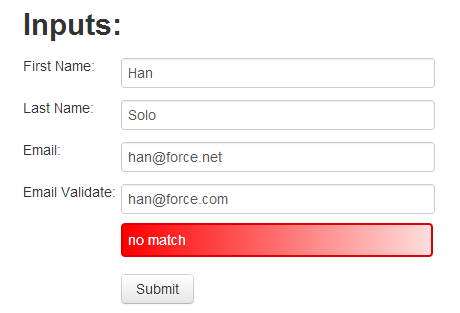
Test this by first trying two different email addresses:
Then test it again with an email you know is already in the database.
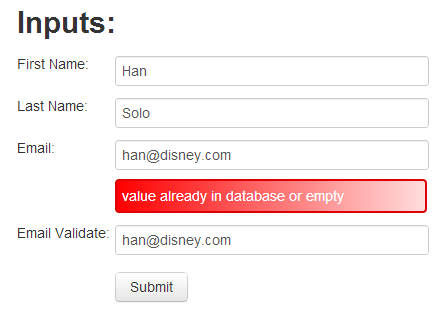
Perfect.
Well, we could edit the actual errors that populate, but that’s a bit more complicated. They’ll suffice for now.
Recap
Again, by adding just a few statements we added much functionality to our form, highlighting the power of such web frameworks like web2py. Well. that’s it for now. In the next tutorial, I’ll show you in brief how to modify the form’s appearance via the CSS files. Oh - and we’ll finally deploy the finished app!
You can find the new code for db.py, display_your_form.html, and default.py here.