Node Twitter Sentiment
In this tutorial we’ll be building an app to pull in real-time Tweets using a Twitter client library for Node called Twit along with NodeJS, Express, and Sentimental (for sentiment analysis).
This is for the Node-js-Denver-Boulder Meetup <3 Cheers!
You can grab the example code here.
Requirements: This tutorial starts where this intro tutorial, Getting Started with Node, ends. If you’ve never set up a Node/Express application before, please start with the intro tutorial. Thanks.
Contents
Project Setup
As you know, Node uses Javascript for both the client and server side. Because of this, the project structure is even more important to not only separate out different concerns (client vs server) but also for your own understanding - e.g., so you can distinguish between client and server side code.
Let’s get to it.
1. Setup basic project structure with Express
$ express twit-decision
2. Install dependencies for Node, Express, and Jade:
$ cd twit-decision && npm install
3. Your project structure should now look like this:
.
├── app.js
├── package.json
├── public
│   ├── images
│   ├── javascripts
│   └── stylesheets
│       └── style.css
├── routes
│   ├── index.js
│   └── user.js
└── views
    ├── index.jade
    └── layout.jade
What’s going on?
- Server side code includes app.js (app configurations, middleware, and routing), the “routes” folder (controller/business logic), and the views folder (views, templates, partials)
- Meanwhile, client side code includes the “public” folder (images, Javascript files, and stylesheets)
4. Run the server
$ node app
You should see the “Welcome to Express” Text.
Server Side Code
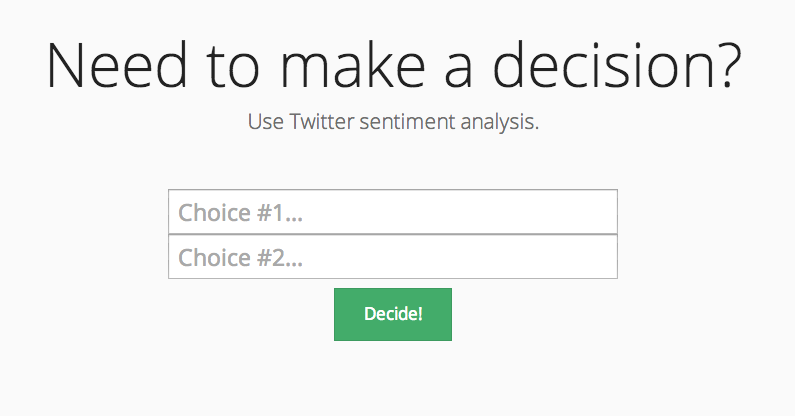
We’ll start with the server side. Our server code will be responsible for serving up our main index page, which will display two input boxes where the end user can enter data for comparison. When the data is passed to the server, via jQuery and AJAX on the client end, the server connects to Twitter, pulls the live tweets, and processes sentiment. Finally, the server sends the results back to the client.
1. Install dependencies
$ npm install twit --save
$ npm install Sentimental --save
2. Updated app.js code
// module dependencies
var express = require('express'),
  routes = require('./routes'),
  http = require('http'),
  path = require('path'),
  fs = require('fs');

// create express app
var app = express();

// all environments
app.set('port', process.env.PORT || 3000);
app.set('views', path.join(__dirname, 'views'));
app.set('view engine', 'jade');
app.use(express.favicon());
app.use(express.logger('dev'));
app.use(express.json());
app.use(express.urlencoded());
app.use(express.methodOverride());
app.use(app.router);
app.use(express.static(path.join(__dirname, 'public')));

// development only
if ('development' == app.get('env')) {
  app.use(express.errorHandler());
}

// routes
app.get('/', routes.index);
app.get('/ping', routes.ping);

// create server
http.createServer(app).listen(app.get('port'), function(){
  console.log('Express server listening on port ' + app.get('port'));
});
You’ve seen the majority of this code already, from the original tutorial, so I won’t go into too much detail. Plus, it’s heavily commented and, right now, it resembles a pretty standard Node/Express app.
Let’s setup our routes next.
3. Routes
var path = require("path");

exports.index = function(req, res){
  res.render('index', { title: "Twit-Decision"});
};

exports.ping = function(req, res){
  res.send("pong!", 200);
};
Again, pretty straightforward here. We are serving up one page, index, while the second render parameter passes the title to the view. We also added a test route, called ping, which will just display ping on the page.
Test it out. Navigate to http://localhost:3000/ping. You should see “pong!” in the top left corner.
4. Views
Update index.jade
doctype html
html
  head
    title= title
    meta(charset='utf-8')
    meta(name='viewport', content='width=device-width, initial-scale=1.0')
    meta(name='description', content='')
    meta(name='author', content='Michael Herman')
    link(href='http://netdna.bootstrapcdn.com/bootswatch/3.1.0/yeti/bootstrap.min.css', rel='stylesheet', media='screen')
    link(href='/stylesheets/main.css', rel='stylesheet', media='screen')
  body
    .container
      .jumbotron
        h1 Need to make a decision?
        p.lead Use Twitter sentiment analysis.
        br
        br
        .form-container
          form(action='', method='post')
            input#choice1.choice(type='text', data-choice='1', placeholder='Choice #1...', name='choice1')
            input#choice2.choice(type='text', data-choice='2', placeholder='Choice #2...', name='choice2')
            input#decision.btn.btn-success.btn-lg(type='submit', value='Decide!')
        br
        br
        .decision-container
          p#status
          p#decision-text
          p#score
          input#again.btn.btn-success.btn-lg(value='Again?')
    script(src='http://code.jquery.com/jquery-1.11.0.min.js')
    script(src='http://netdna.bootstrapcdn.com/bootstrap/3.1.1/js/bootstrap.min.js')
    script(src='javascripts/main.js')
This is our only template that we need. It’s the index page, used for markup, and coded using the Jade Template Language. If this is confusing, I suggest converting this code to HTML and comparing the differences. We have the typical meta tags a links to CSS sheets in the <head>. The <body> includes a form as well as a number of selectors for appending the results of the sentiment analysis. Most of the styling is done in Bootstrap.
Let’s quickly jump to the client side.
Client Side
1. Styles
Add these custom styles to the main.css style within the “stylesheets” folder:
.container {
  max-width: 1000px;
  padding-top: 50px;
  text-align: center;
}
.choice {
  width:100%;
  height:50px;
  font-size:25px;
  padding:10px;
}
#decision-text {
  font-weight:bold;
  font-size:60px;
}
#decision {
  margin-top:10px;
}
#status, #score {
  font-size:25px;
}
.form-container {
  margin: auto;
  max-width: 500px;
}
.decision-container {
  margin: auto;
  max-width: 500px;
}
If you’re curious, see how these CSS styles (values and properties) align up to the selectors in the jade template.
2. Client Side Javascript
$(function () {

  // highest # of choices (inputs) allowed
  window.highestChoice = 2;
  // hide again button on page load
  $("#again").hide();

  var goDecide = function(e) {
    // prevent default browser behavior upon submit
    e.preventDefault();
    // erase old values
    $("#status").text('');
    $("#score").text('');
    // hide decision text
    $("#decision-text").hide();
    $("#again").hide();
    // display processing text, update color to black in case of an error
    $("#status").css("color", "black");
    $("#status").text("Processing ...");
    // create variable to see if any of the inputs are input
    var anyEmpty = false;
    // array to hold inputs
    var choices = [];
    // grab values, add to choices array
    for(var i = 1; i <= window.highestChoice; i++) {
      var choiceValue = $("#choice"+i).val();
      if(choiceValue == '') {
        anyEmpty = true;
      } else {
        if(choices.indexOf(choiceValue) == -1) {
          choices.push(choiceValue);
        }
      }
    }
    // Handling *some* errors
    if(!anyEmpty) {
      if($("#choice1").val() != $("#choice2").val()) {
        // send values to server side for processing, wait for callback, getting AJAXy
        $.post('/search', {'choices': JSON.stringify(choices)}, function(data) {
          data = JSON.parse(data);
          // append data to the DOM
          $(".form-container").hide()
          $("#status").text("and the winner is ...");
          $("#decision-text").text(data['choice']);
          $("#score").text('... with a score of ' + data['score'] + '');
          $("#decision-text").fadeIn();
          $("#score").fadeIn();
          $("#again").show()
        });
      } else {
        // error code
        $("#status").css("color", "red");
        $("#status").text("Both choices are the same. Try again.");
      }
    } else {
      // error code
      $("#status").css("color", "red");
      $("#status").text("You must enter a value for both choices.");
    }
  }


  // ----- MAIN ----- //

  // on click, run the goDecide function
  $("#decision").click(goDecide);
  // on click new form is shown
  $("#again").click(function() {
    $(".form-container").show()
    $("#again").hide()
    // erase old values
    $("#status").text('');
    $("#score").text('');
    $("#choice1").val('');
    $("#choice2").val('');
    // hide decision text
    $("#decision-text").hide();
  });

});
Now comes the fun part! Add a main.js file to your “javascripts” folder.
Yes, there’s a lot going on here. Fortunately, it’s well documented.
Start with the // ----- MAIN ----- // code. This essentially controls everything else. Nothing happens until the decision button is clicked. Once that happens the goDecide() function fires. This is where things get, well, interested.
Go through it line by line, reading the comment, then code. Make sure you understand what each statement is doing.
Notice how the magic starts happening when the data is grabbed from the inputs, added to an array, and then sent to the server side via AJAX. Notice the /search endpoint. We pass the stringified choice array to that endpoint, which needs to be setup on the server side, then what for the data to comeback before appending it to the DOM.
Check out the rest of the code on your own. Follow the comments for assistance.
Back to the Server Side
So, we need to set up a new route, ‘/search’, on the server side to handle the data sent from the client side.
1. app.js
First, add the route to app.js:
app.post('/search', routes.search)
2. Update routes:
Then add the following code to index.js in the “routes” folder:
exports.search = function(req, res) {
  // grab the request from the client
  var choices = JSON.parse(req.body.choices);
  // grab the current date
  var today = new Date();
  // establish the twitter config (grab your keys at dev.twitter.com)
  var twitter = new twit({
    consumer_key: config.consumer_key,
    consumer_secret: config.consumer_secret,
    access_token: config.access_token,
    access_token_secret: config.access_token_secret
  });
  // set highest score
  var highestScore = -Infinity;
  // set highest choice
  var highestChoice = null;
  // create new array
  var array = [];
  // set score
  var score = 0;
  console.log("----------")

  // iterate through the choices array from the request
  for(var i = 0; i < choices.length; i++) {
    (function(i) {
    // add choice to new array
    array.push(choices[i])
    // grad 20 tweets from today
    twitter.get('search/tweets', {q: '' + choices[i] + ' since:' + today.getFullYear() + '-' +
      (today.getMonth() + 1) + '-' + today.getDate(), count:20}, function(err, data) {
        // perform sentiment analysis
        score = performAnalysis(data['statuses']);
        console.log("score:", score)
        console.log("choice:", choices[i])
        //  determine winner
        if(score > highestScore) {
          highestScore = score;
          highestChoice = choices[i];
          console.log("winner:",choices[i])
        }
        console.log("")
      });
    })(i)
  }
  // send response back to the server side; why the need for the timeout?
  setTimeout(function() { res.end(JSON.stringify({'score': highestScore, 'choice': highestChoice})) }, 5000);
};
Again, I’ve commented this heavily. So go through, line by line, and see what’s happening.
Points of note:
- Add your Twitter config keys to a new file called config.js. More on this in the next section.
- Why are we using a timeout? Try removing it. What happens? Why is this a bad practice?
3. Config
Open the config_example.js file. Save the file as config.js, then add your own Twitter keys. Add this as a dependency along with Twit and Sentimental to your index.js file:
var twit = require('twit');
var sentimental = require('Sentimental');
var config = require("./config")
4. Twitter
Remember this line from your routes file, index.js:
score = performAnalysis(data['statuses']);
Well, we pass the pulled tweets as arguments into the performAnalysis() function.
performAnalysis
Let’s add that function:
function performAnalysis(tweetSet) {
  //set a results variable
  var results = 0;
  // iterate through the tweets, pulling the text, retweet count, and favorite count
  for(var i = 0; i < tweetSet.length; i++) {
    tweet = tweetSet[i]['text'];
    retweets = tweetSet[i]['retweet_count'];
    favorites = tweetSet[i]['favorite_count'];
    // remove the hastag from the tweet text
    tweet = tweet.replace('#', '');
    // perform sentiment on the text
    var score = sentimental.analyze(tweet)['score'];
    // calculate score
    results += score;
    if(score > 0){
      if(retweets > 0) {
        results += (Math.log(retweets)/Math.log(2));
      }
      if(favorites > 0) {
        results += (Math.log(favorites)/Math.log(2));
      }
    }
    else if(score < 0){
      if(retweets > 0) {
        results -= (Math.log(retweets)/Math.log(2));
      }
      if(favorites > 0) {
        results -= (Math.log(favorites)/Math.log(2));
      }
    }
    else {
      results += 0;
    }
  }
  // return score
  results = results / tweetSet.length;
  return results
}
After the tweets are passed in, the text is parsed and sentiment is analyzed. Finally a score is calculated and returned.
Boom. That’s it!
Your project structure should now look like:
.
├── app.js
├── config.js
├── package.json
├── public
│   ├── images
│   ├── javascripts
│   │   └── main.js
│   └── stylesheets
│       └── main.css
├── routes
│   └── index.js
└── views
    └── index.jade
Test time!
Conclusion
Test this out a few times. Make sure it all works. Perhaps go through it iteratively, following along with the code for further understanding.
Think about what you could add to make this app more fun/unique?
- Perhaps add a persistence layer, such as MongoDB, to retain the history of your searches to see sentiment over time.
- Ability to display actual tweets.